Bodo Managed Cloud Platform on AWS
Registration
a. Subscribe through the AWS Marketplace.
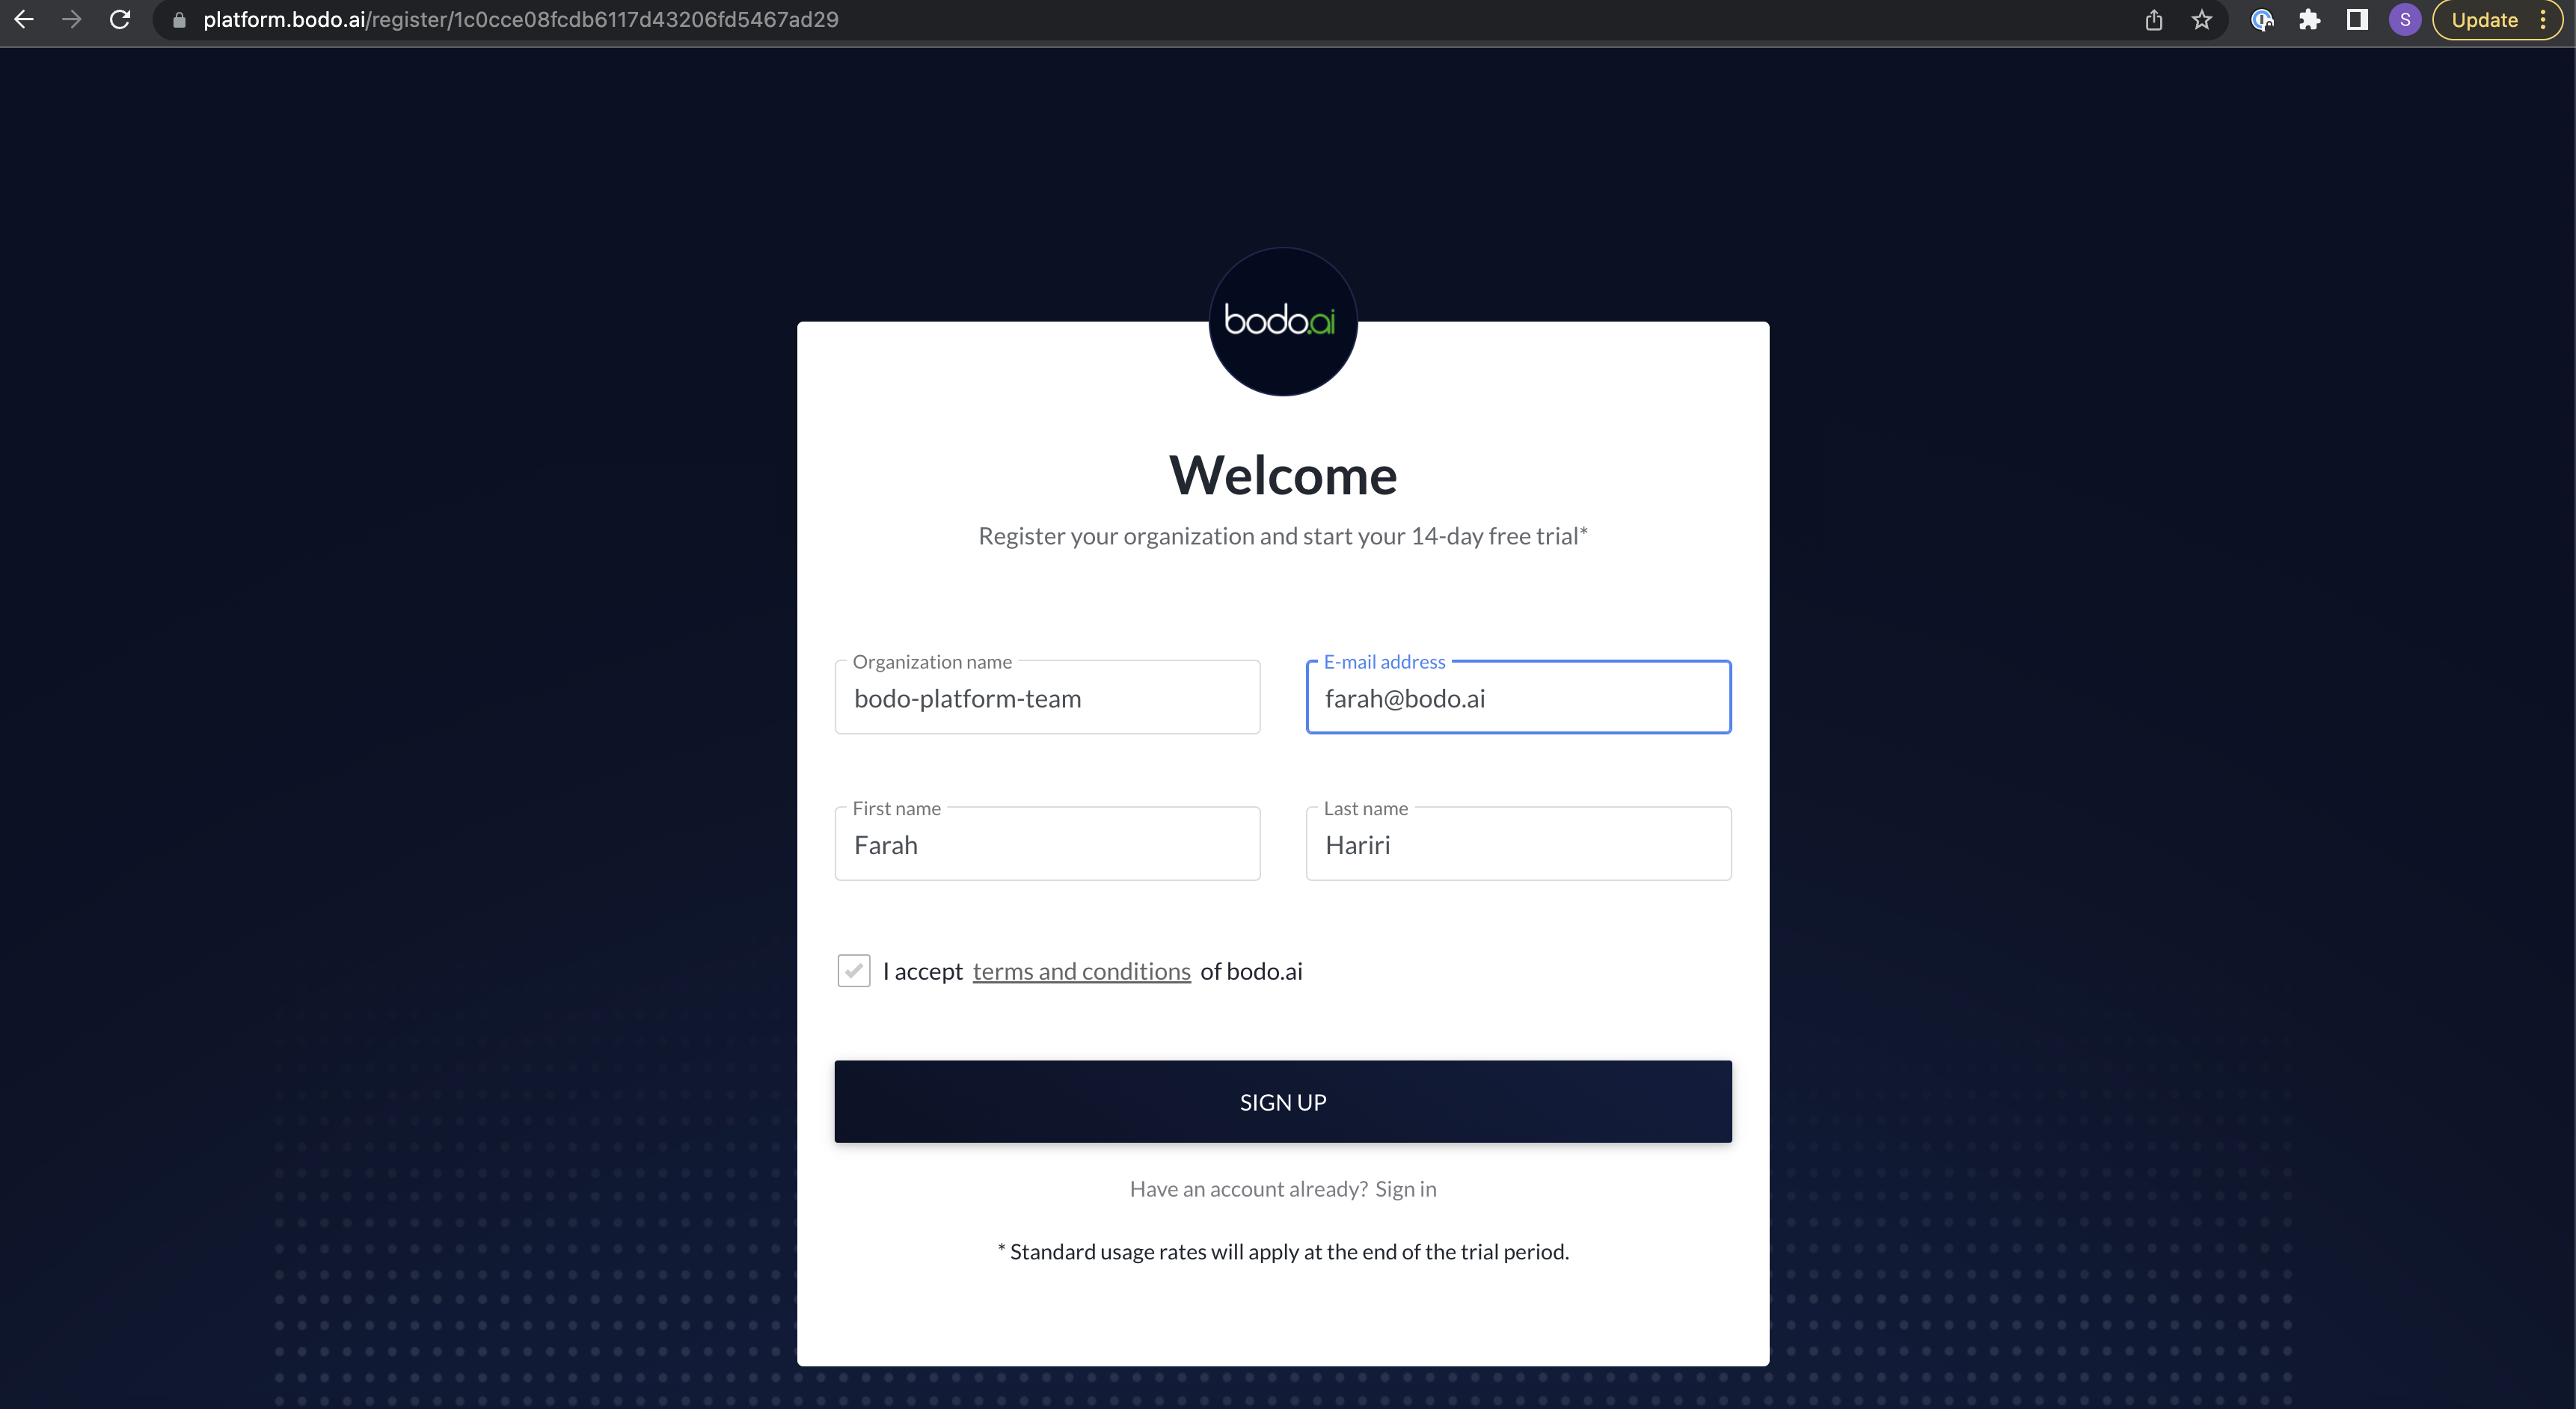
b. After confirming your subscription, you'll be directed to Bodo Platform's registration page.
c. Fill out the fields with your information. If this is your individual account, use a unique name such as firstname_lastname for the Organization Name field.
d. Check the box for accepting terms and conditions and click on
SIGN UP:
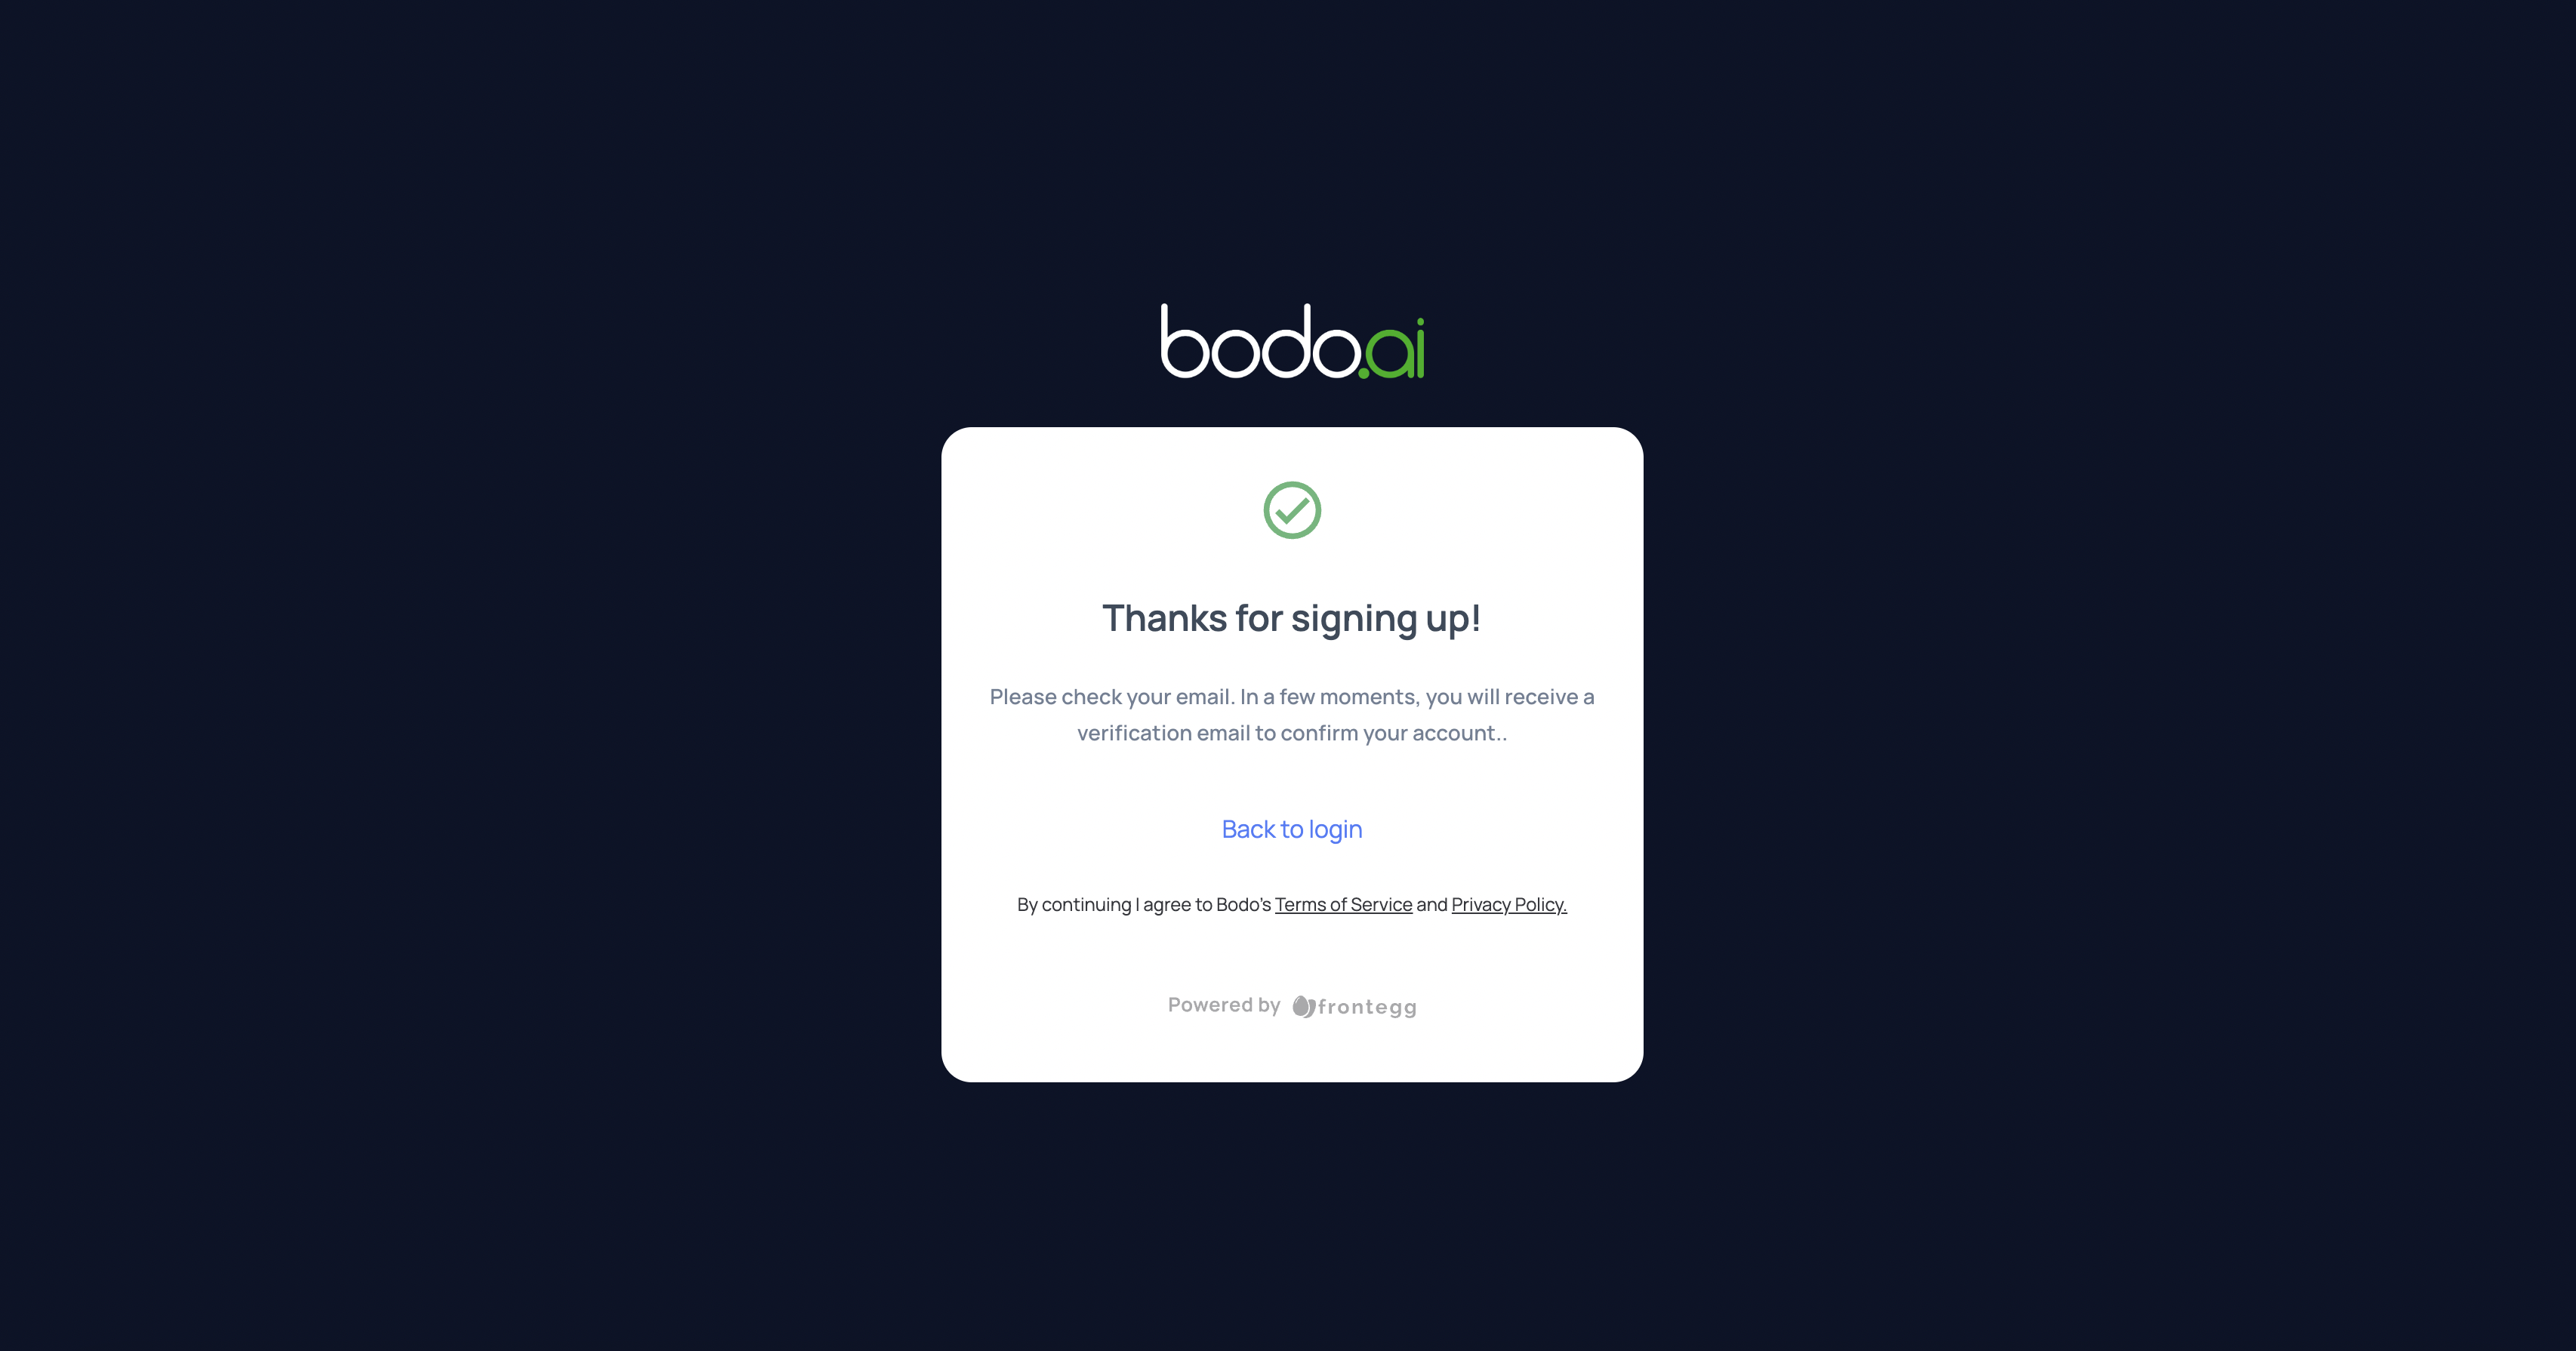
e. A page confirming that an activation link was sent to your email
will appear. Please open the email and click on the activation link:
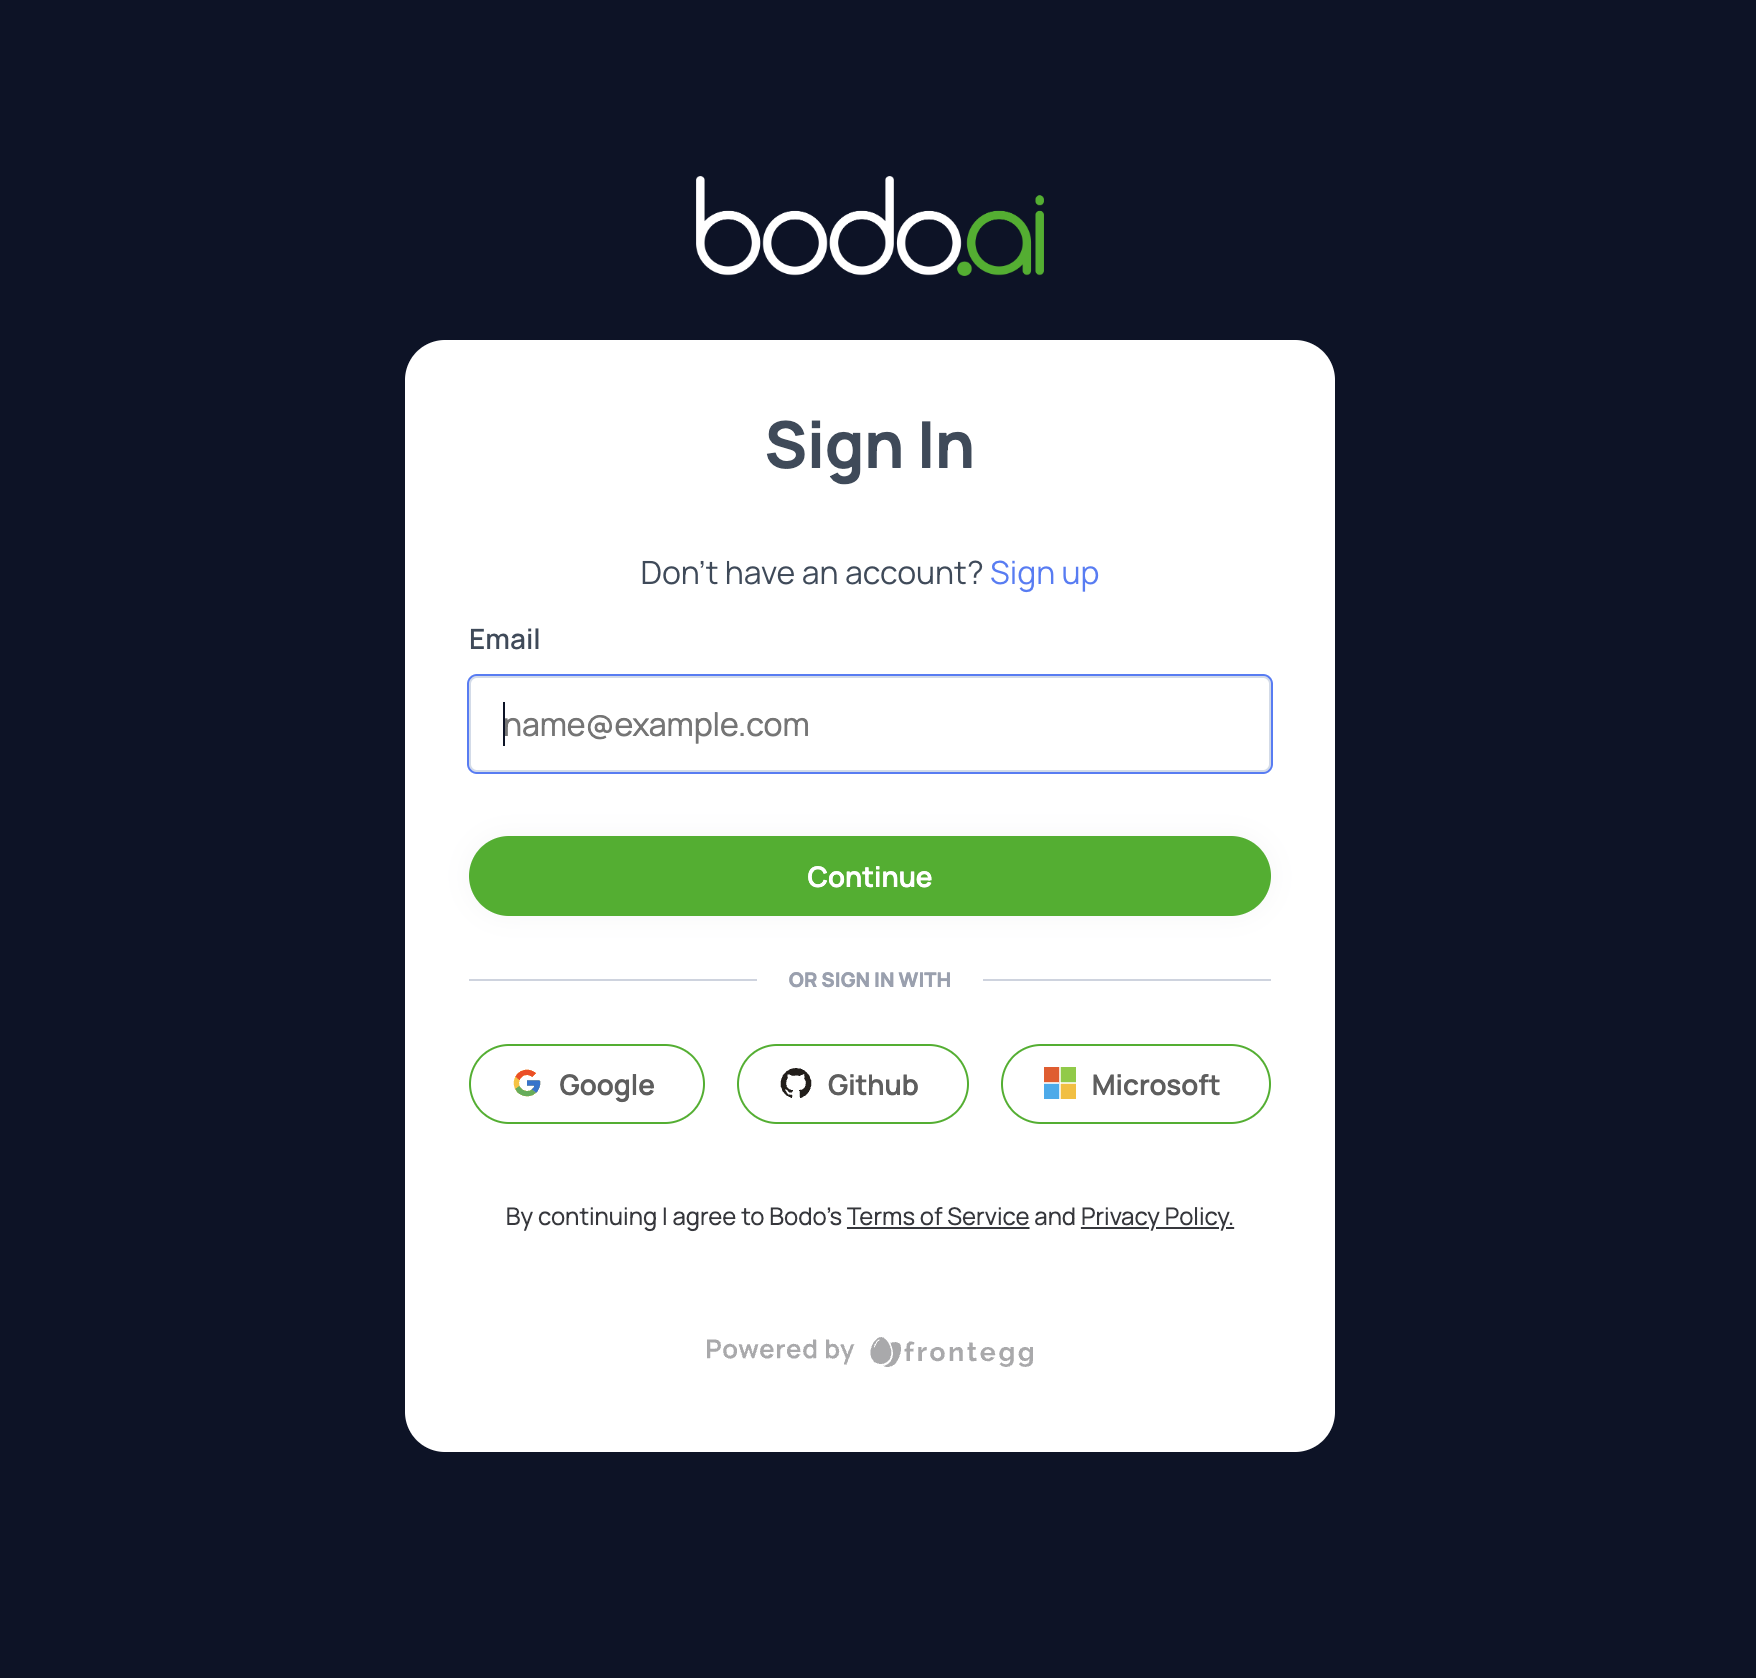
 Clicking on the confirmation link will take you to the bodo platform
page where you can use your newly created credentials to sign in:
Clicking on the confirmation link will take you to the bodo platform
page where you can use your newly created credentials to sign in:
Setting AWS Credentials
To use Bodo on AWS, you need to link your AWS account to the Bodo platform. This can be done using the Cloud Configuration page in the left bar as shown in the picture below:
To be able to use the Bodo Platform to launch clusters and notebooks, you must grant it permission to access your AWS account and provision the required resources in it. This can be done through two ways:
1. With Access Keys
-
Follow the instructions from AWS Account and Access Keys guide to create/retrieve your AWS access key ID and secret access key.
-
Enter the Access Key ID and Secret created in the previous step.
-
Select the region the where the metadata will be stored and click on
CREATE.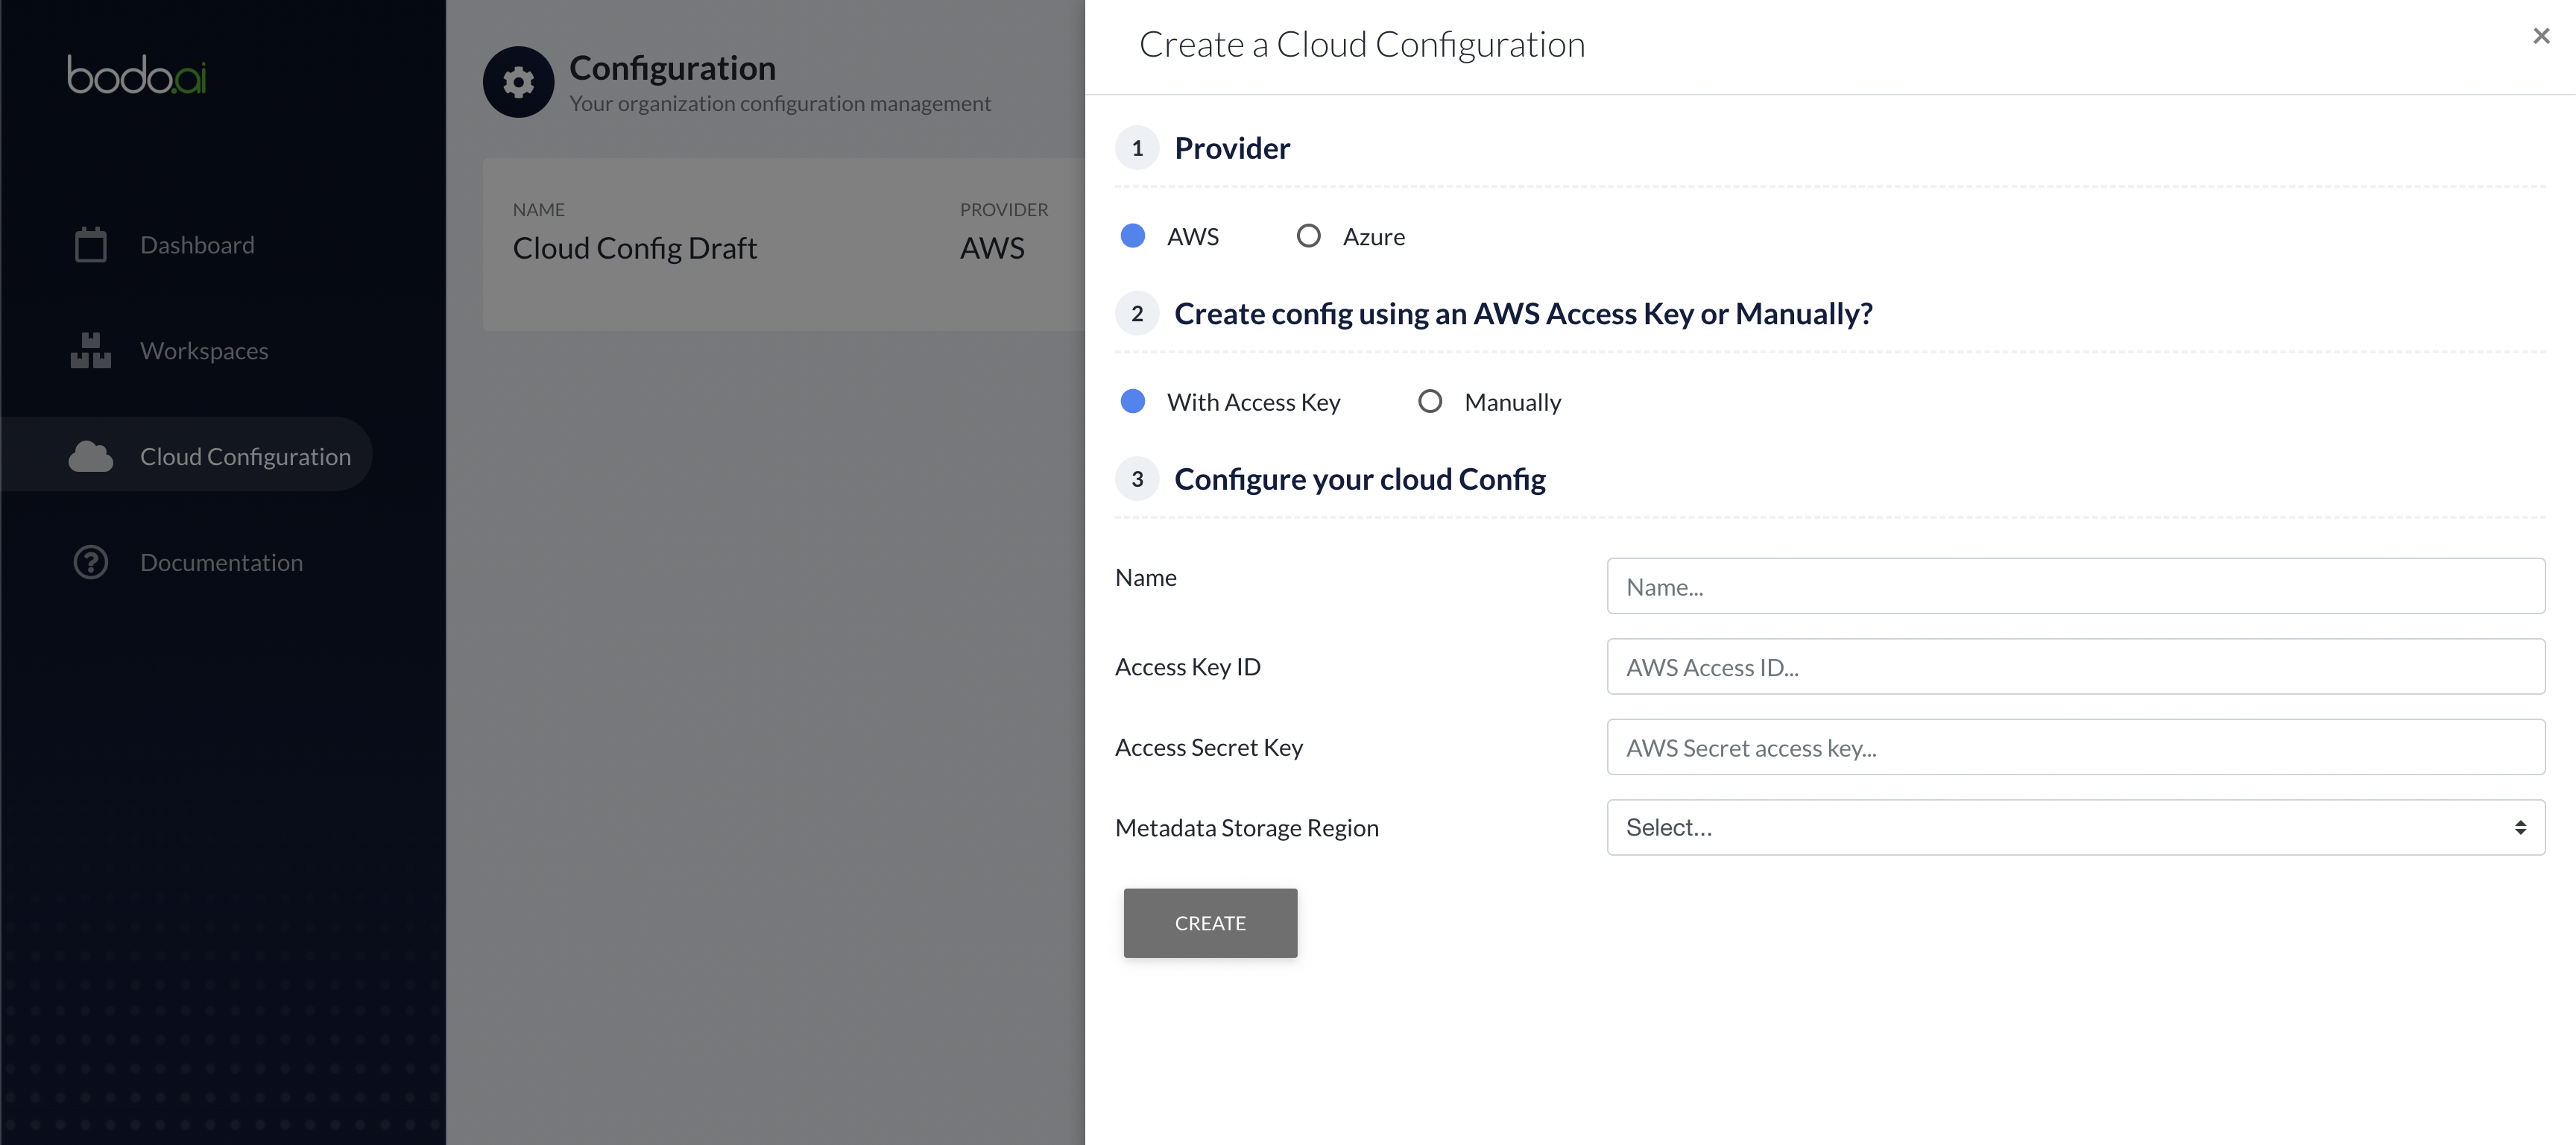
Note
This has been tested using access keys that have
S3FullAccess,DynamoDBFullAccessandIAMFullAccesspermissions. Access keys with limited permissions will not work.Note
We will not save the provided Access Keys for security reasons.
2. Manual Process
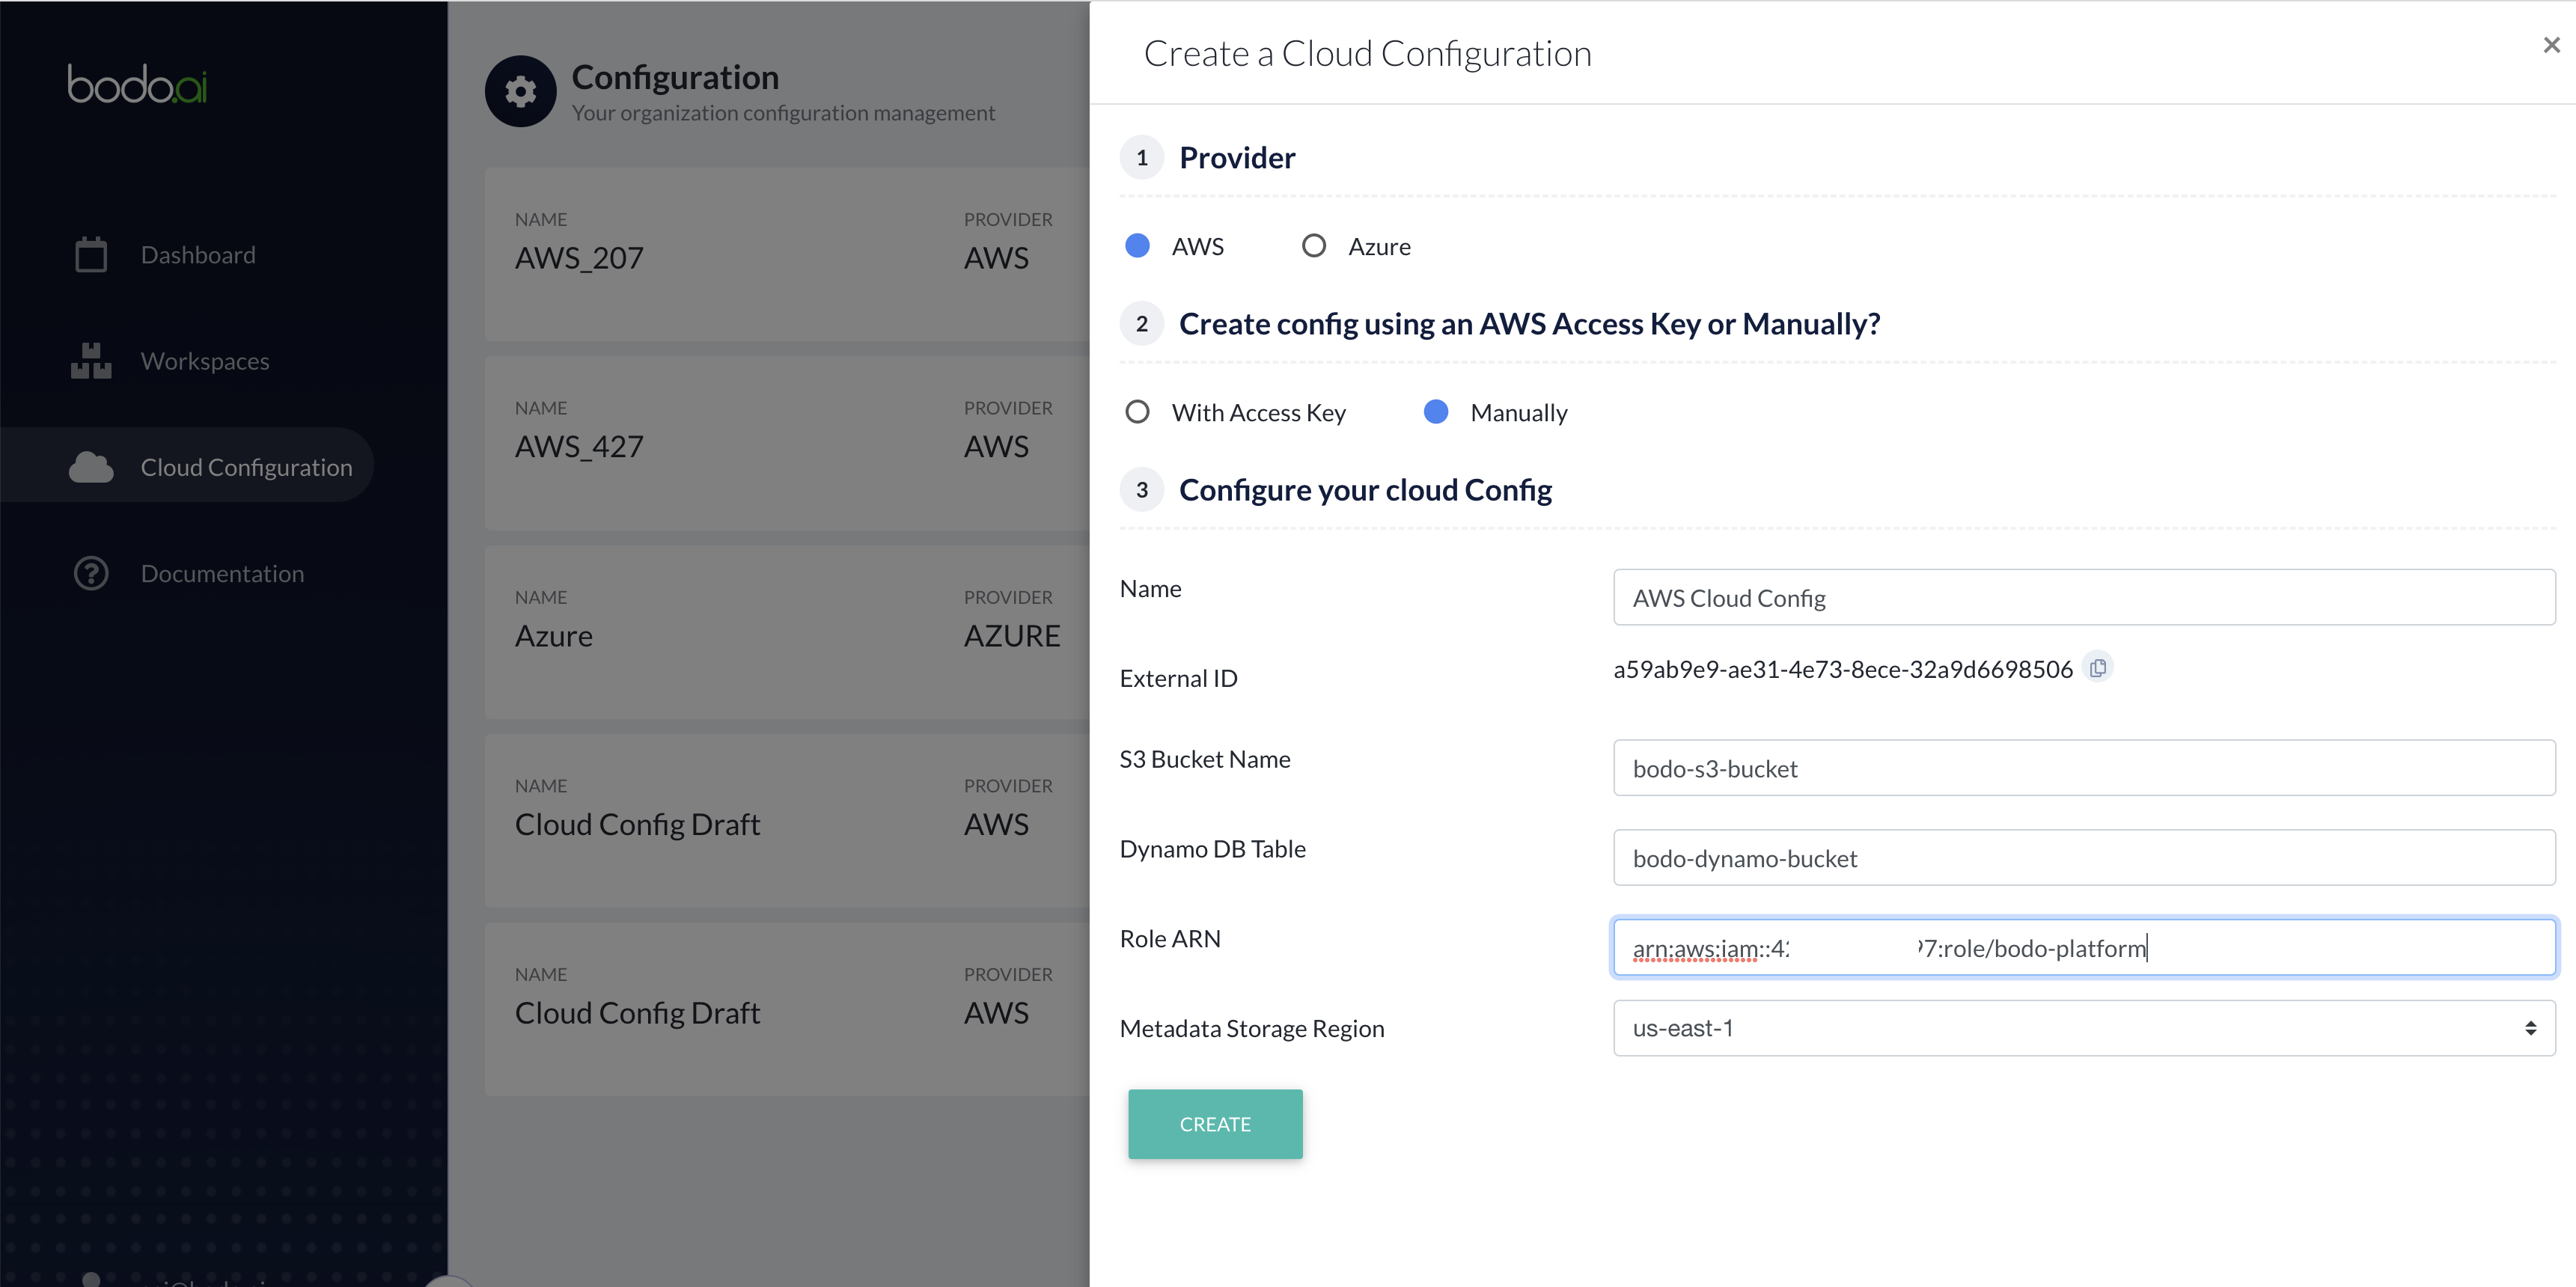
Open the Cloud Configuration Form and note down the External ID.
We need to create 3 resources through the AWS Console and provide details about them in the Cloud Configuration Form.
Before that, Open the Cloud Configuration Form and note down the External ID.
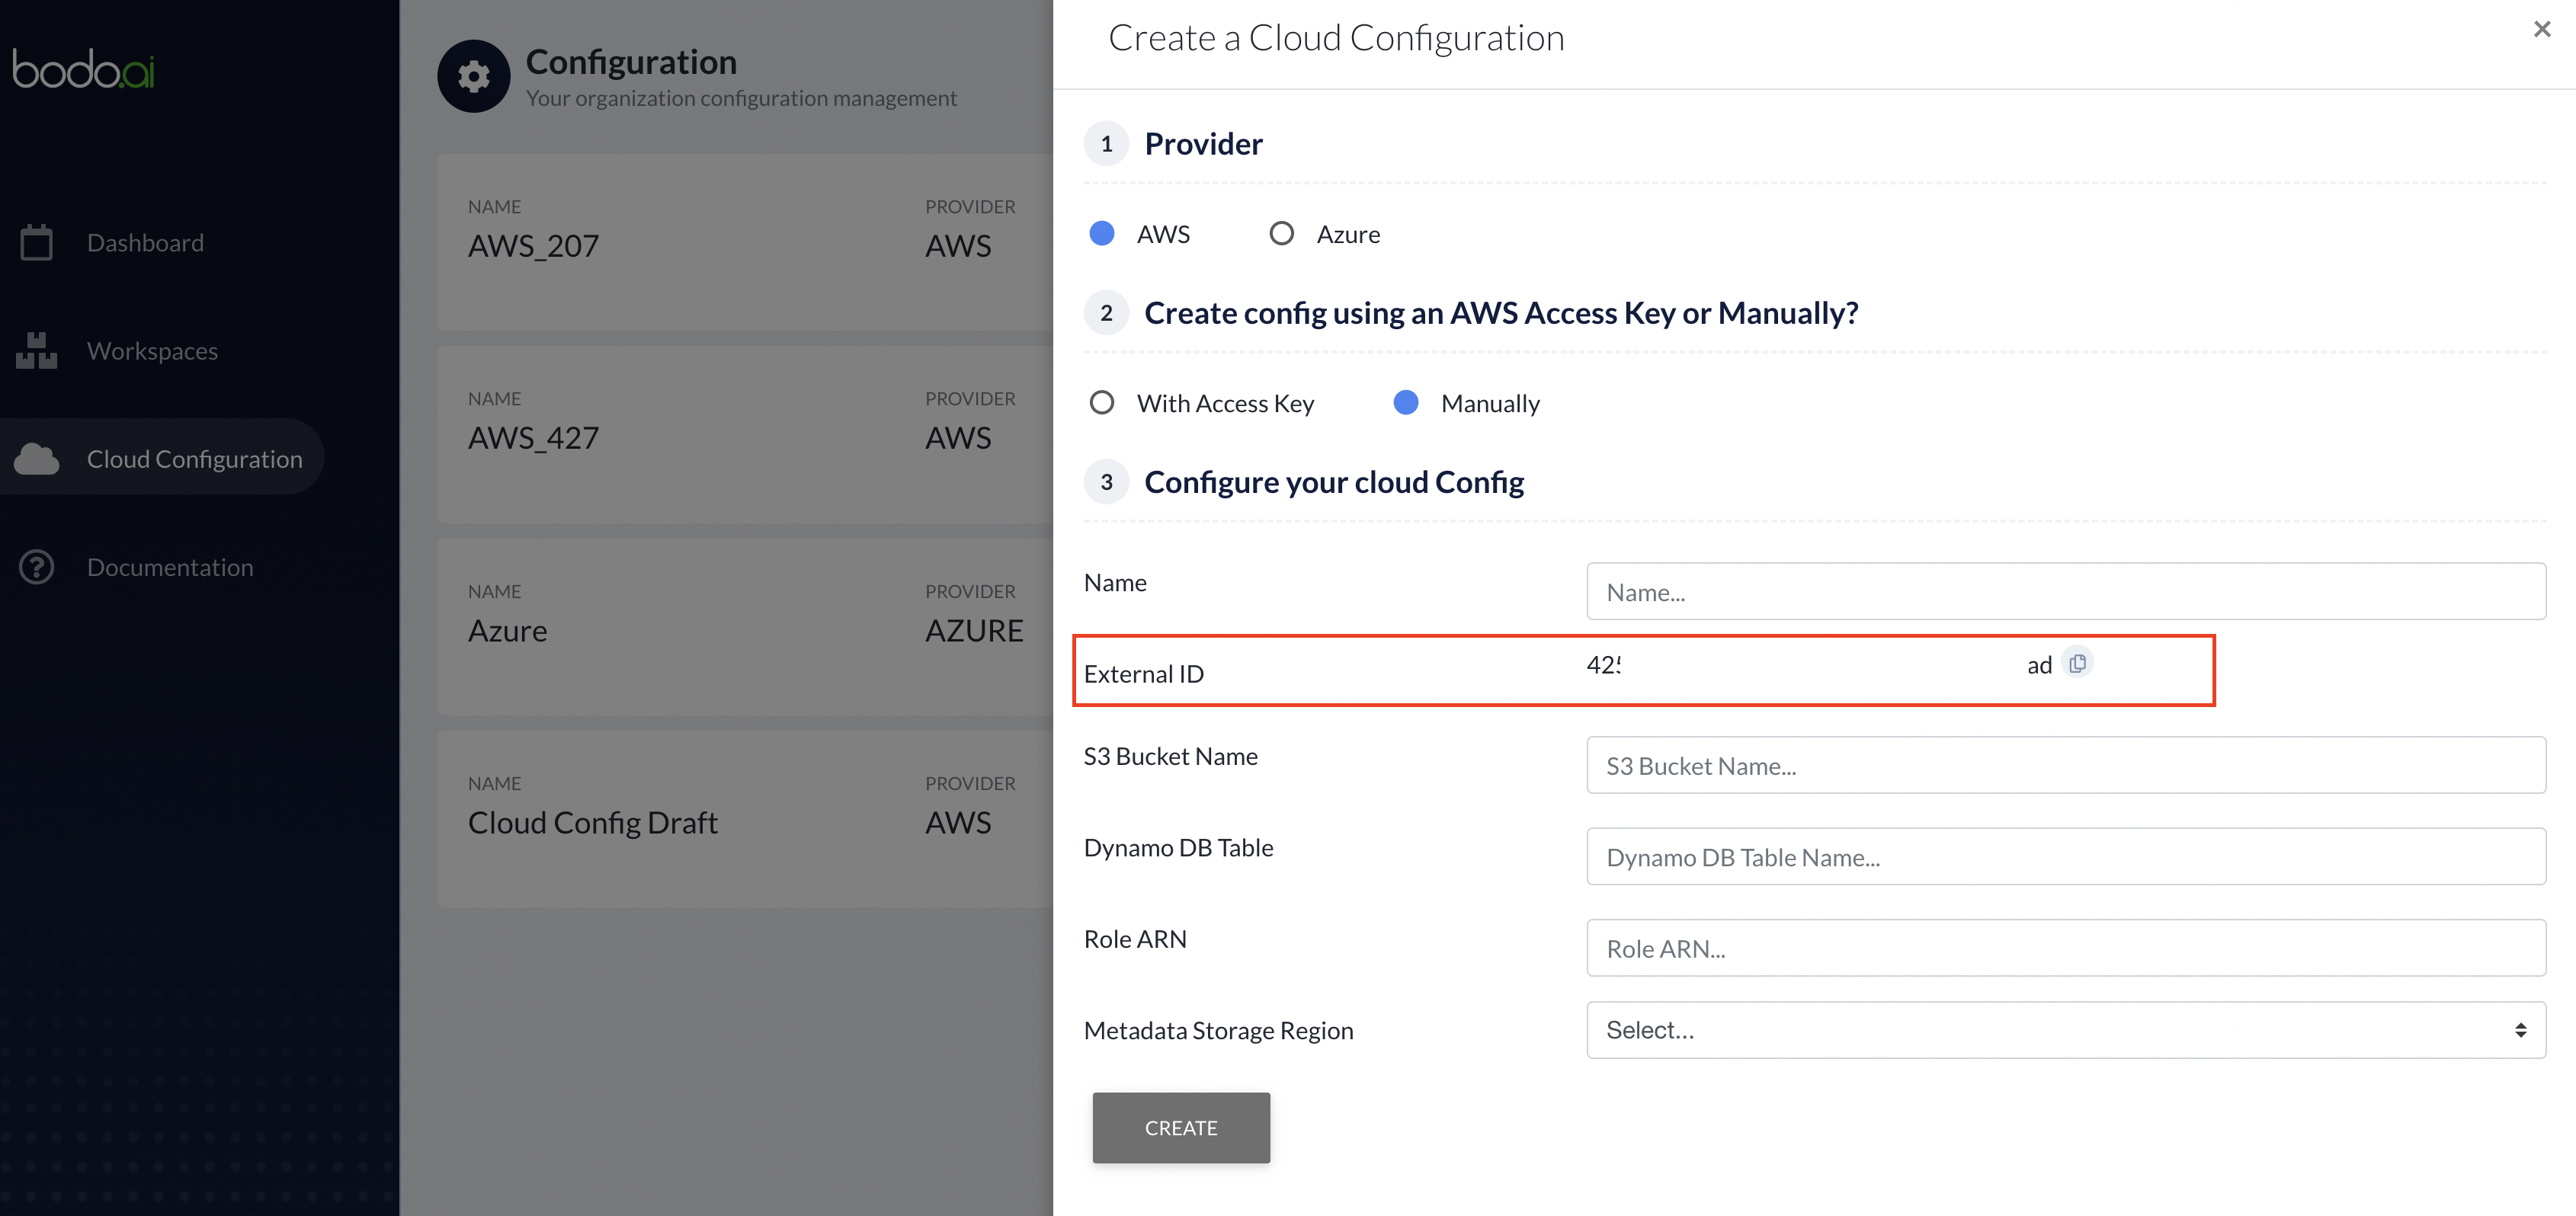
Note
The S3 bucket and the Dynamo DB table should be created in the same region. Supported regions are: 'us-east-1', 'us-east-2', 'us-west-1' and 'us-west-2'.
Setup S3 Bucket
-
Setup S3 Bucket
-
In AWS console, go to S3 Management Console and click on
Create Bucket.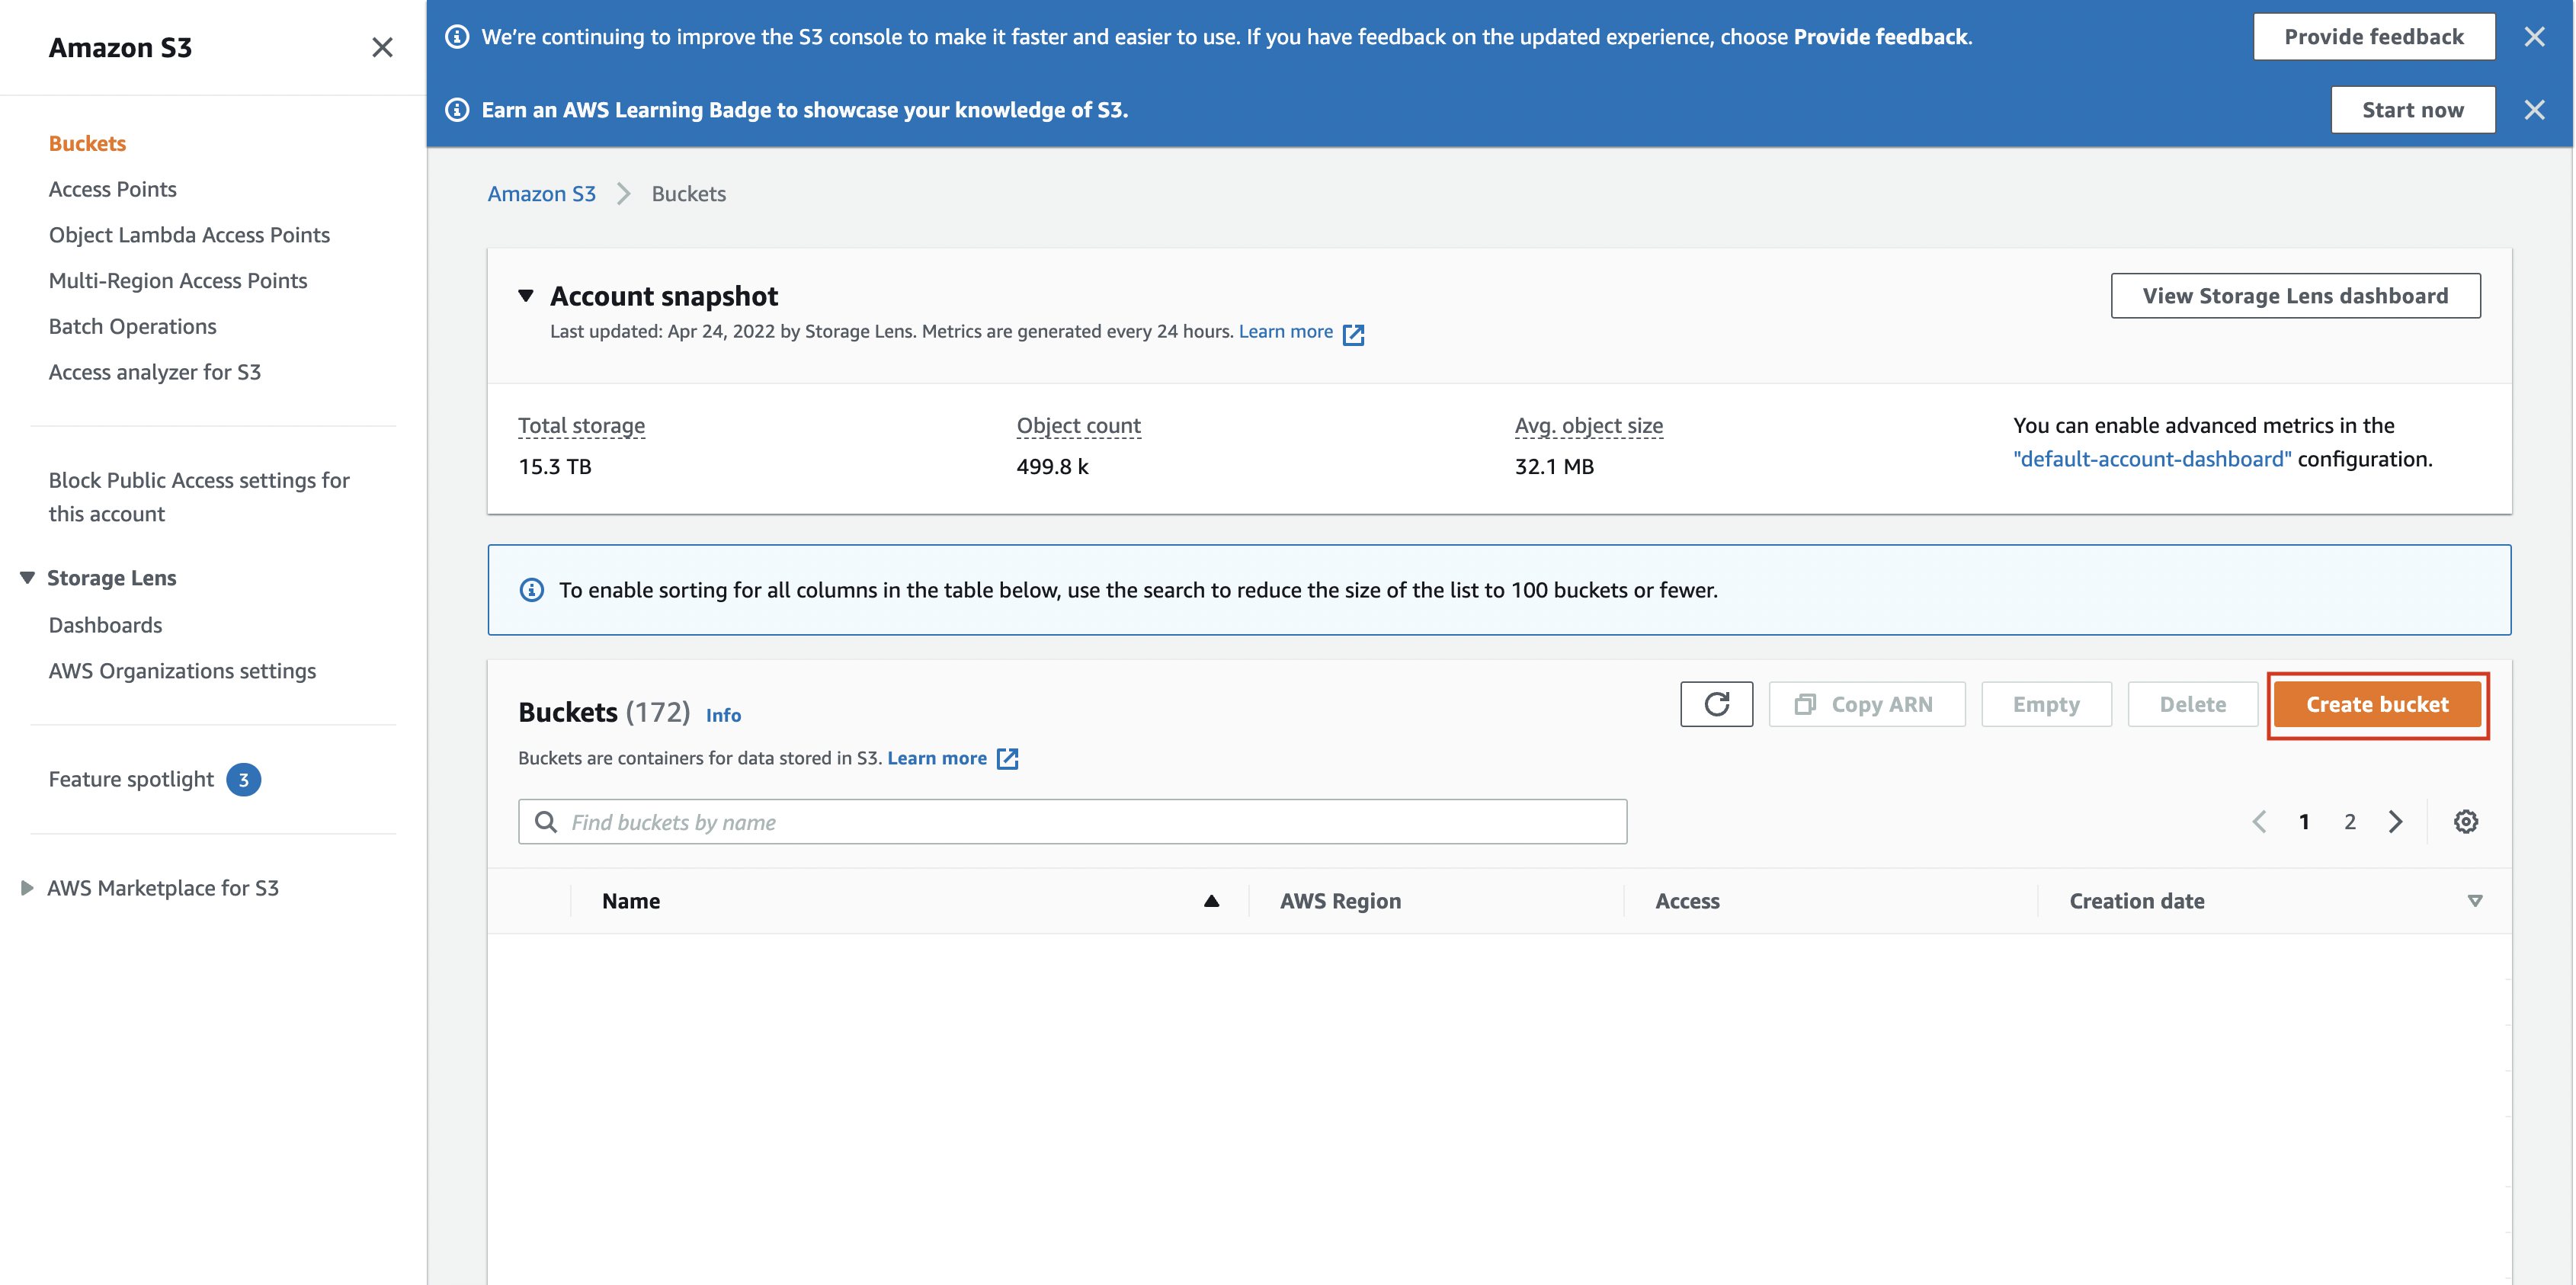
-
In the creation form, enter the Bucket Name and select the AWS Region. Note these down since you will need to enter them in the Cloud Configuration Form.
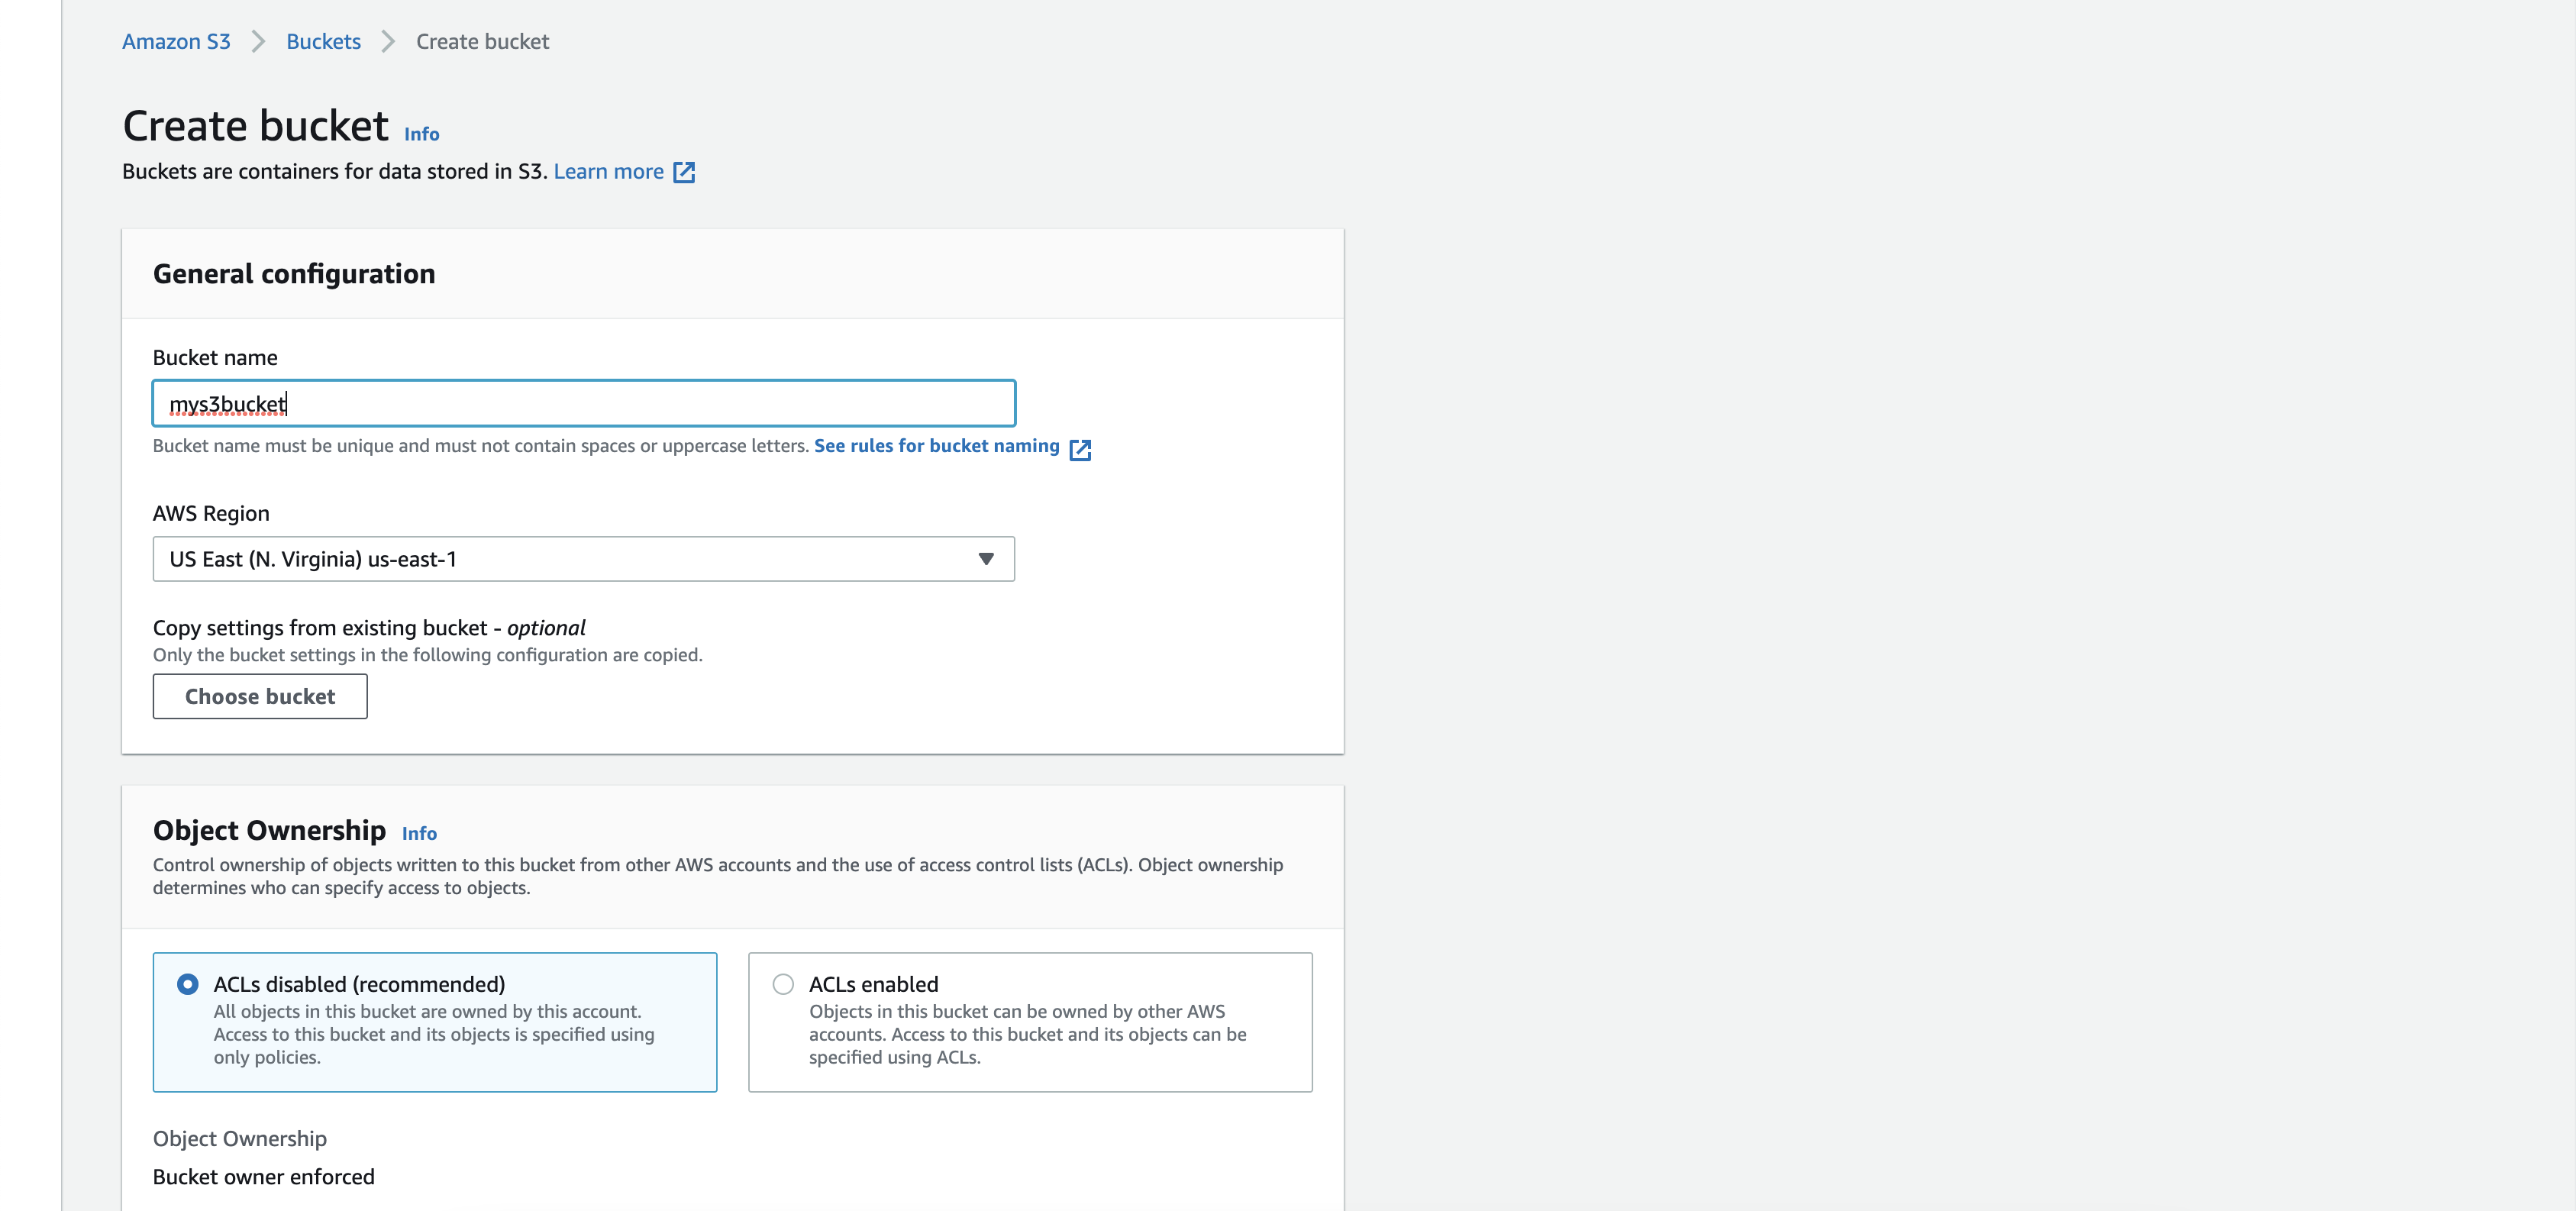
-
All other fields can remain as it is by default and click on
Create Bucket.
-
Setup Dynamo DB table
-
Setup Dynamo DB table
-
In AWS console, go to Dynamo DB page and click on
Create Table.
-
In the table creation form, enter the Table name. Note this down since you will need to enter it in the Cloud Configuration Form.
-
Under Partition key, enter the partion key as LockID and select the type as String. This partion key must be created for Bodo Platform to work.

-
All other fields can remain as it is by default and click on
Create Table.
-
Setup IAM role
-
IAM role
-
Log in to the AWS Management Console and navigate to the IAM Service.
-
Select the Roles tab in the sidebar, and click
Create Role. -
In Select type of trusted entity, select
Another AWS Account. -
Enter the Bodo Platform Account ID
481633624848in the Account ID field. -
Check the
Require external IDoption.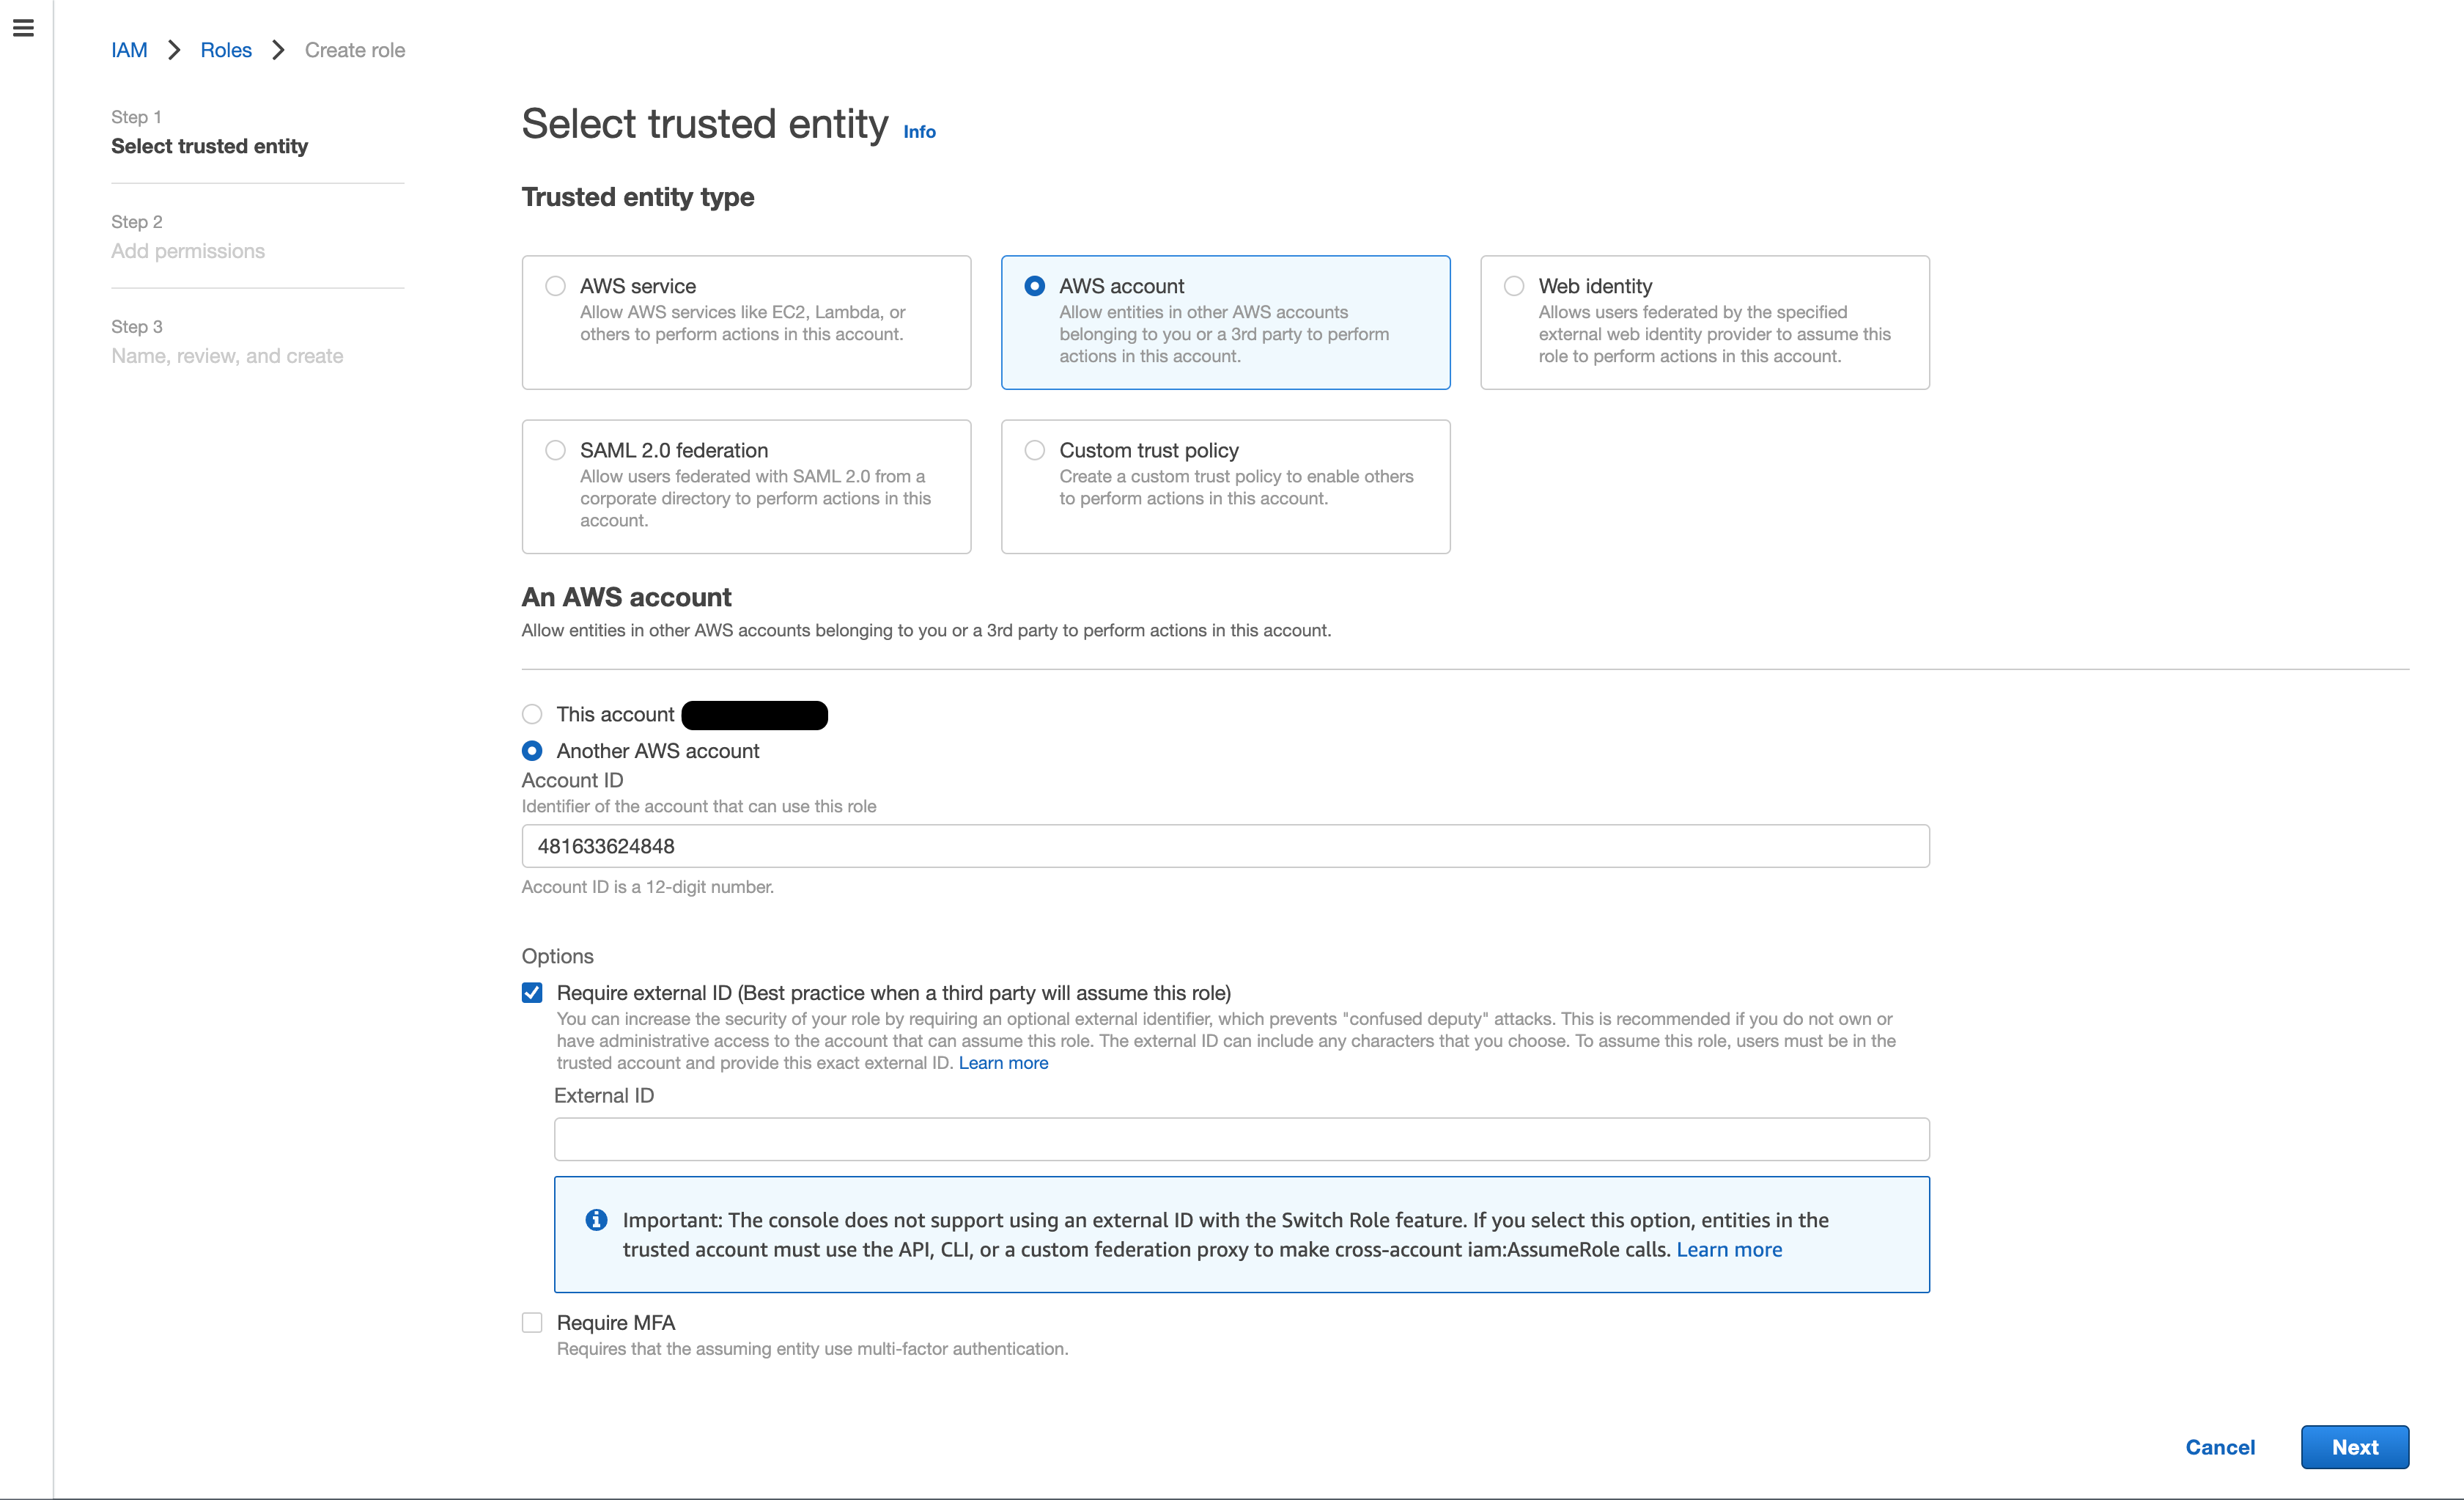
In the External ID field, copy over the External ID from the Cloud Configuration form on the Bodo Platform.

-
Click the
Next: Permissionsbutton. -
Click the
Next: Tagsbutton. -
Click the
Next: Reviewbutton. -
In the Role name field, enter a role name, e.g.
BodoPlatformUser.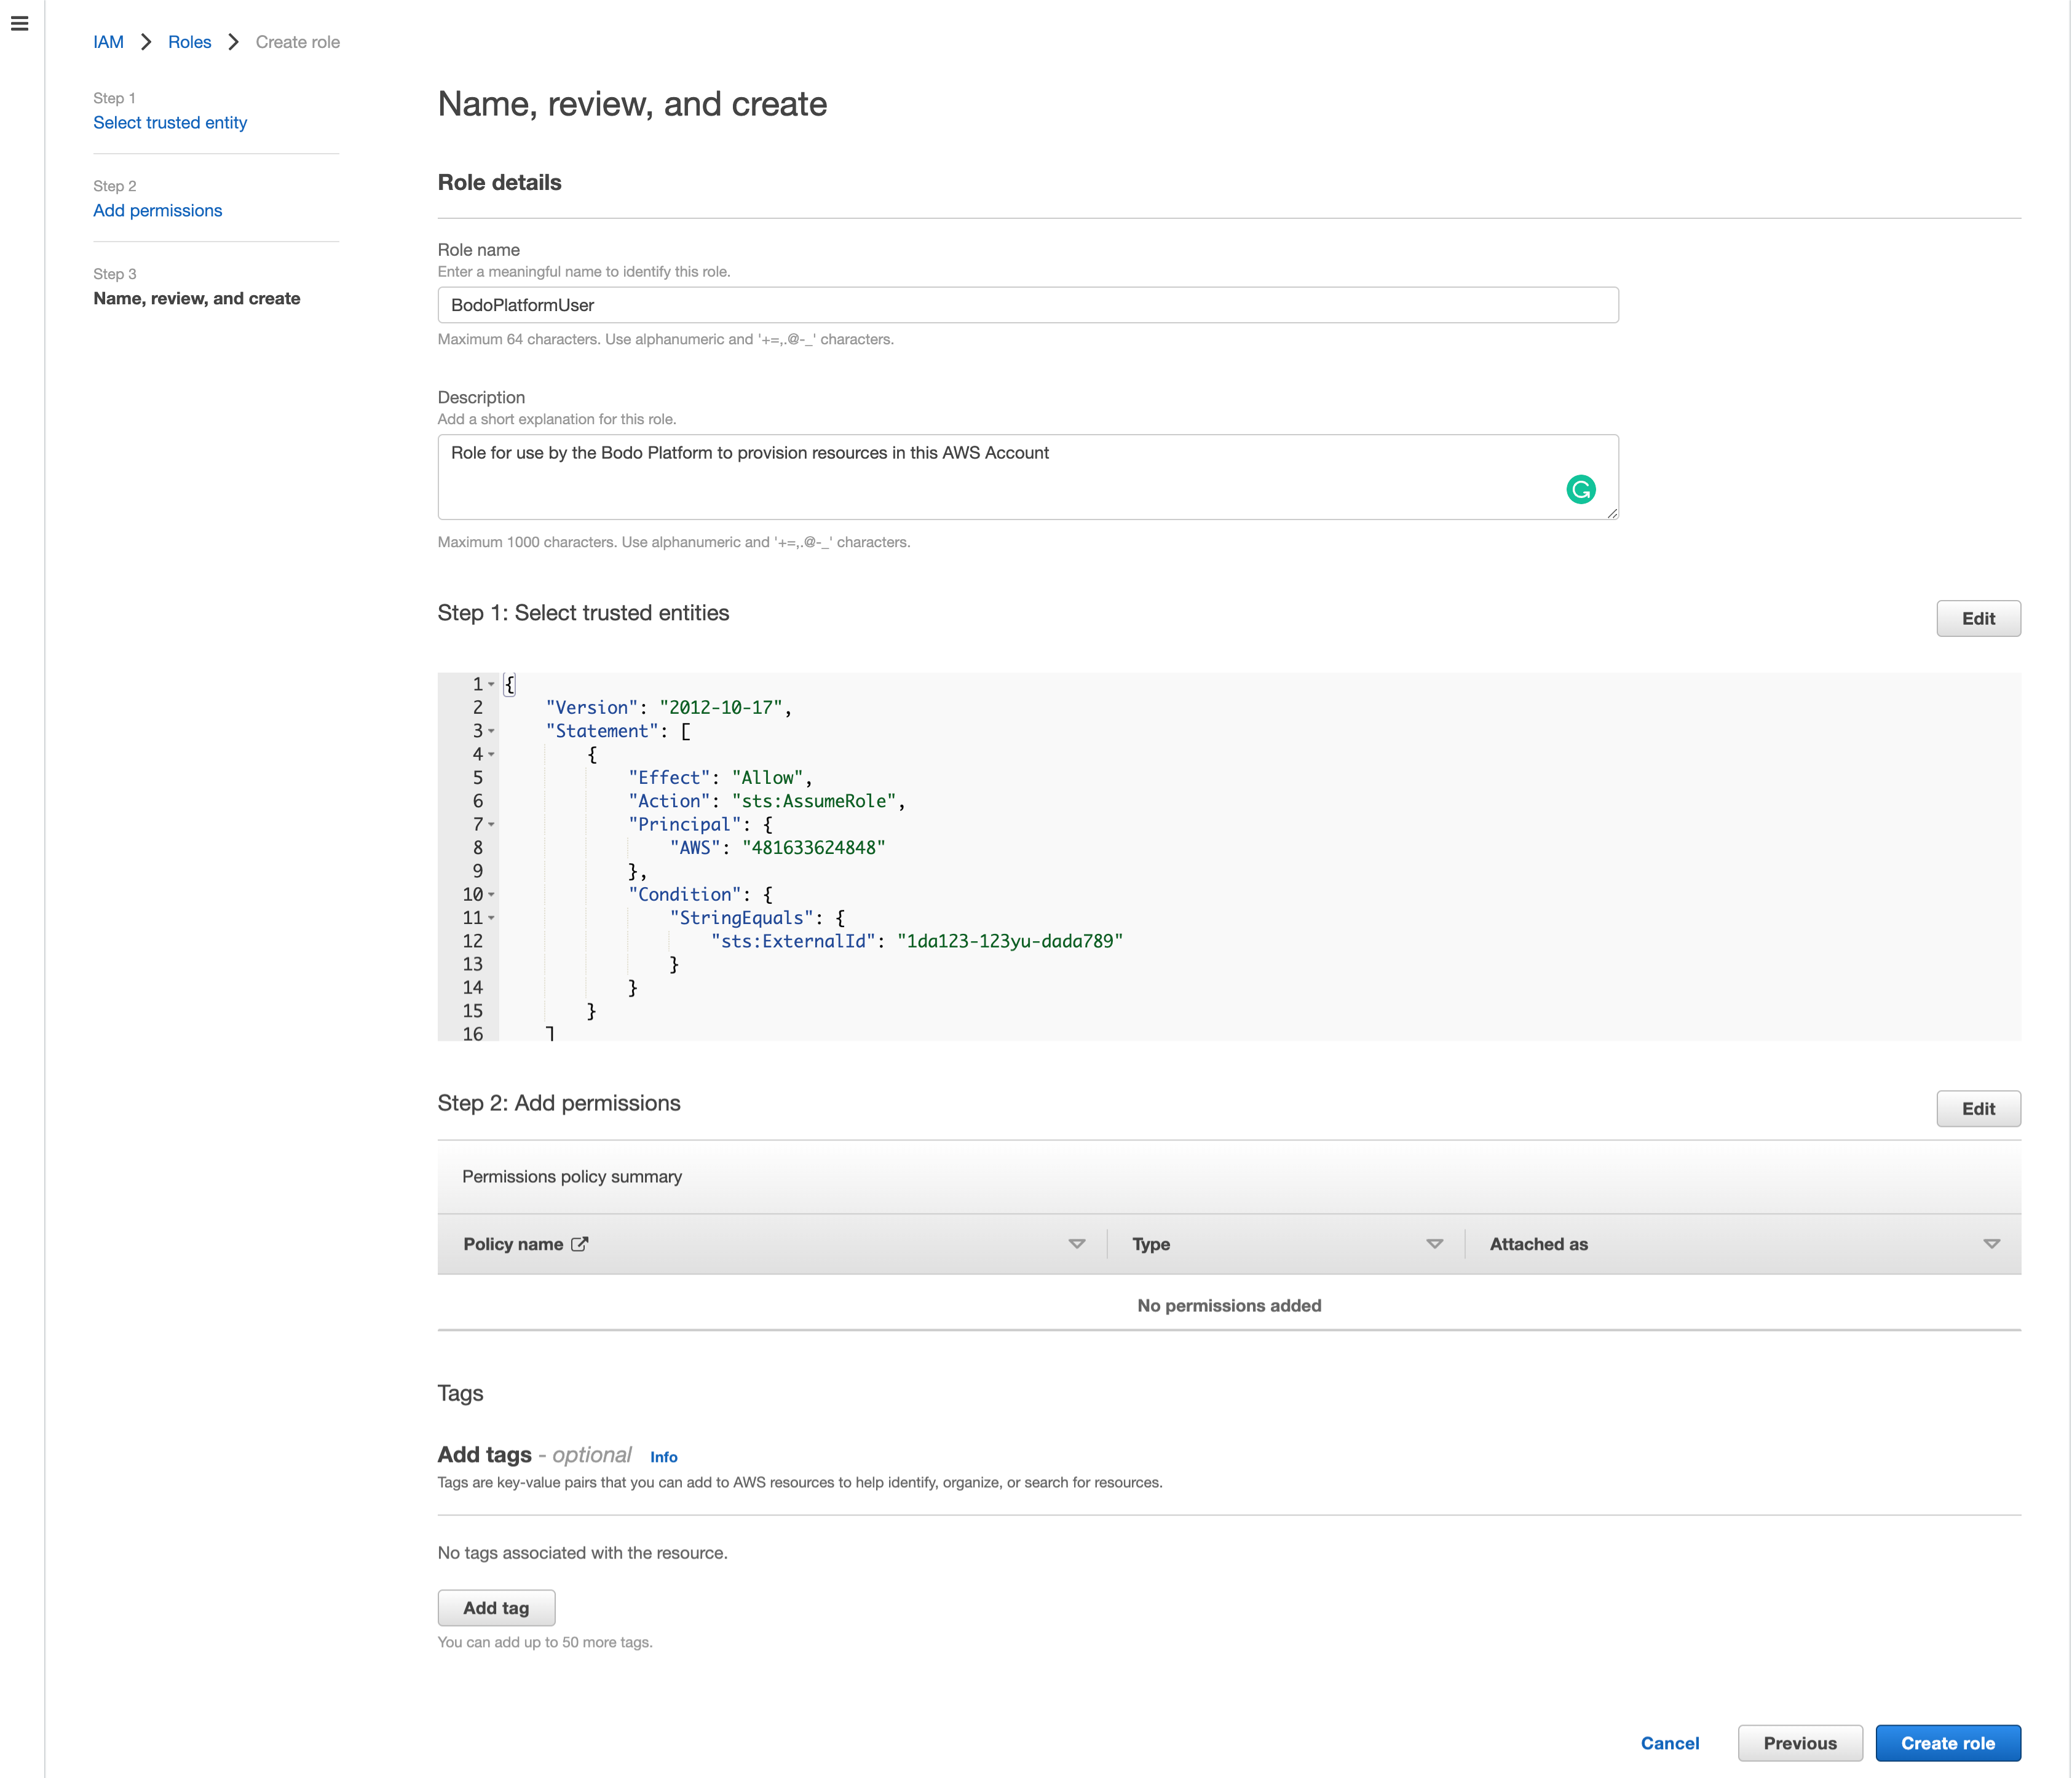
-
Click
Create Role. You will be taken back to the list of IAM Roles in your account. -
In the list of IAM Roles, click on the role you just created.
-
Click on
Add inline policy.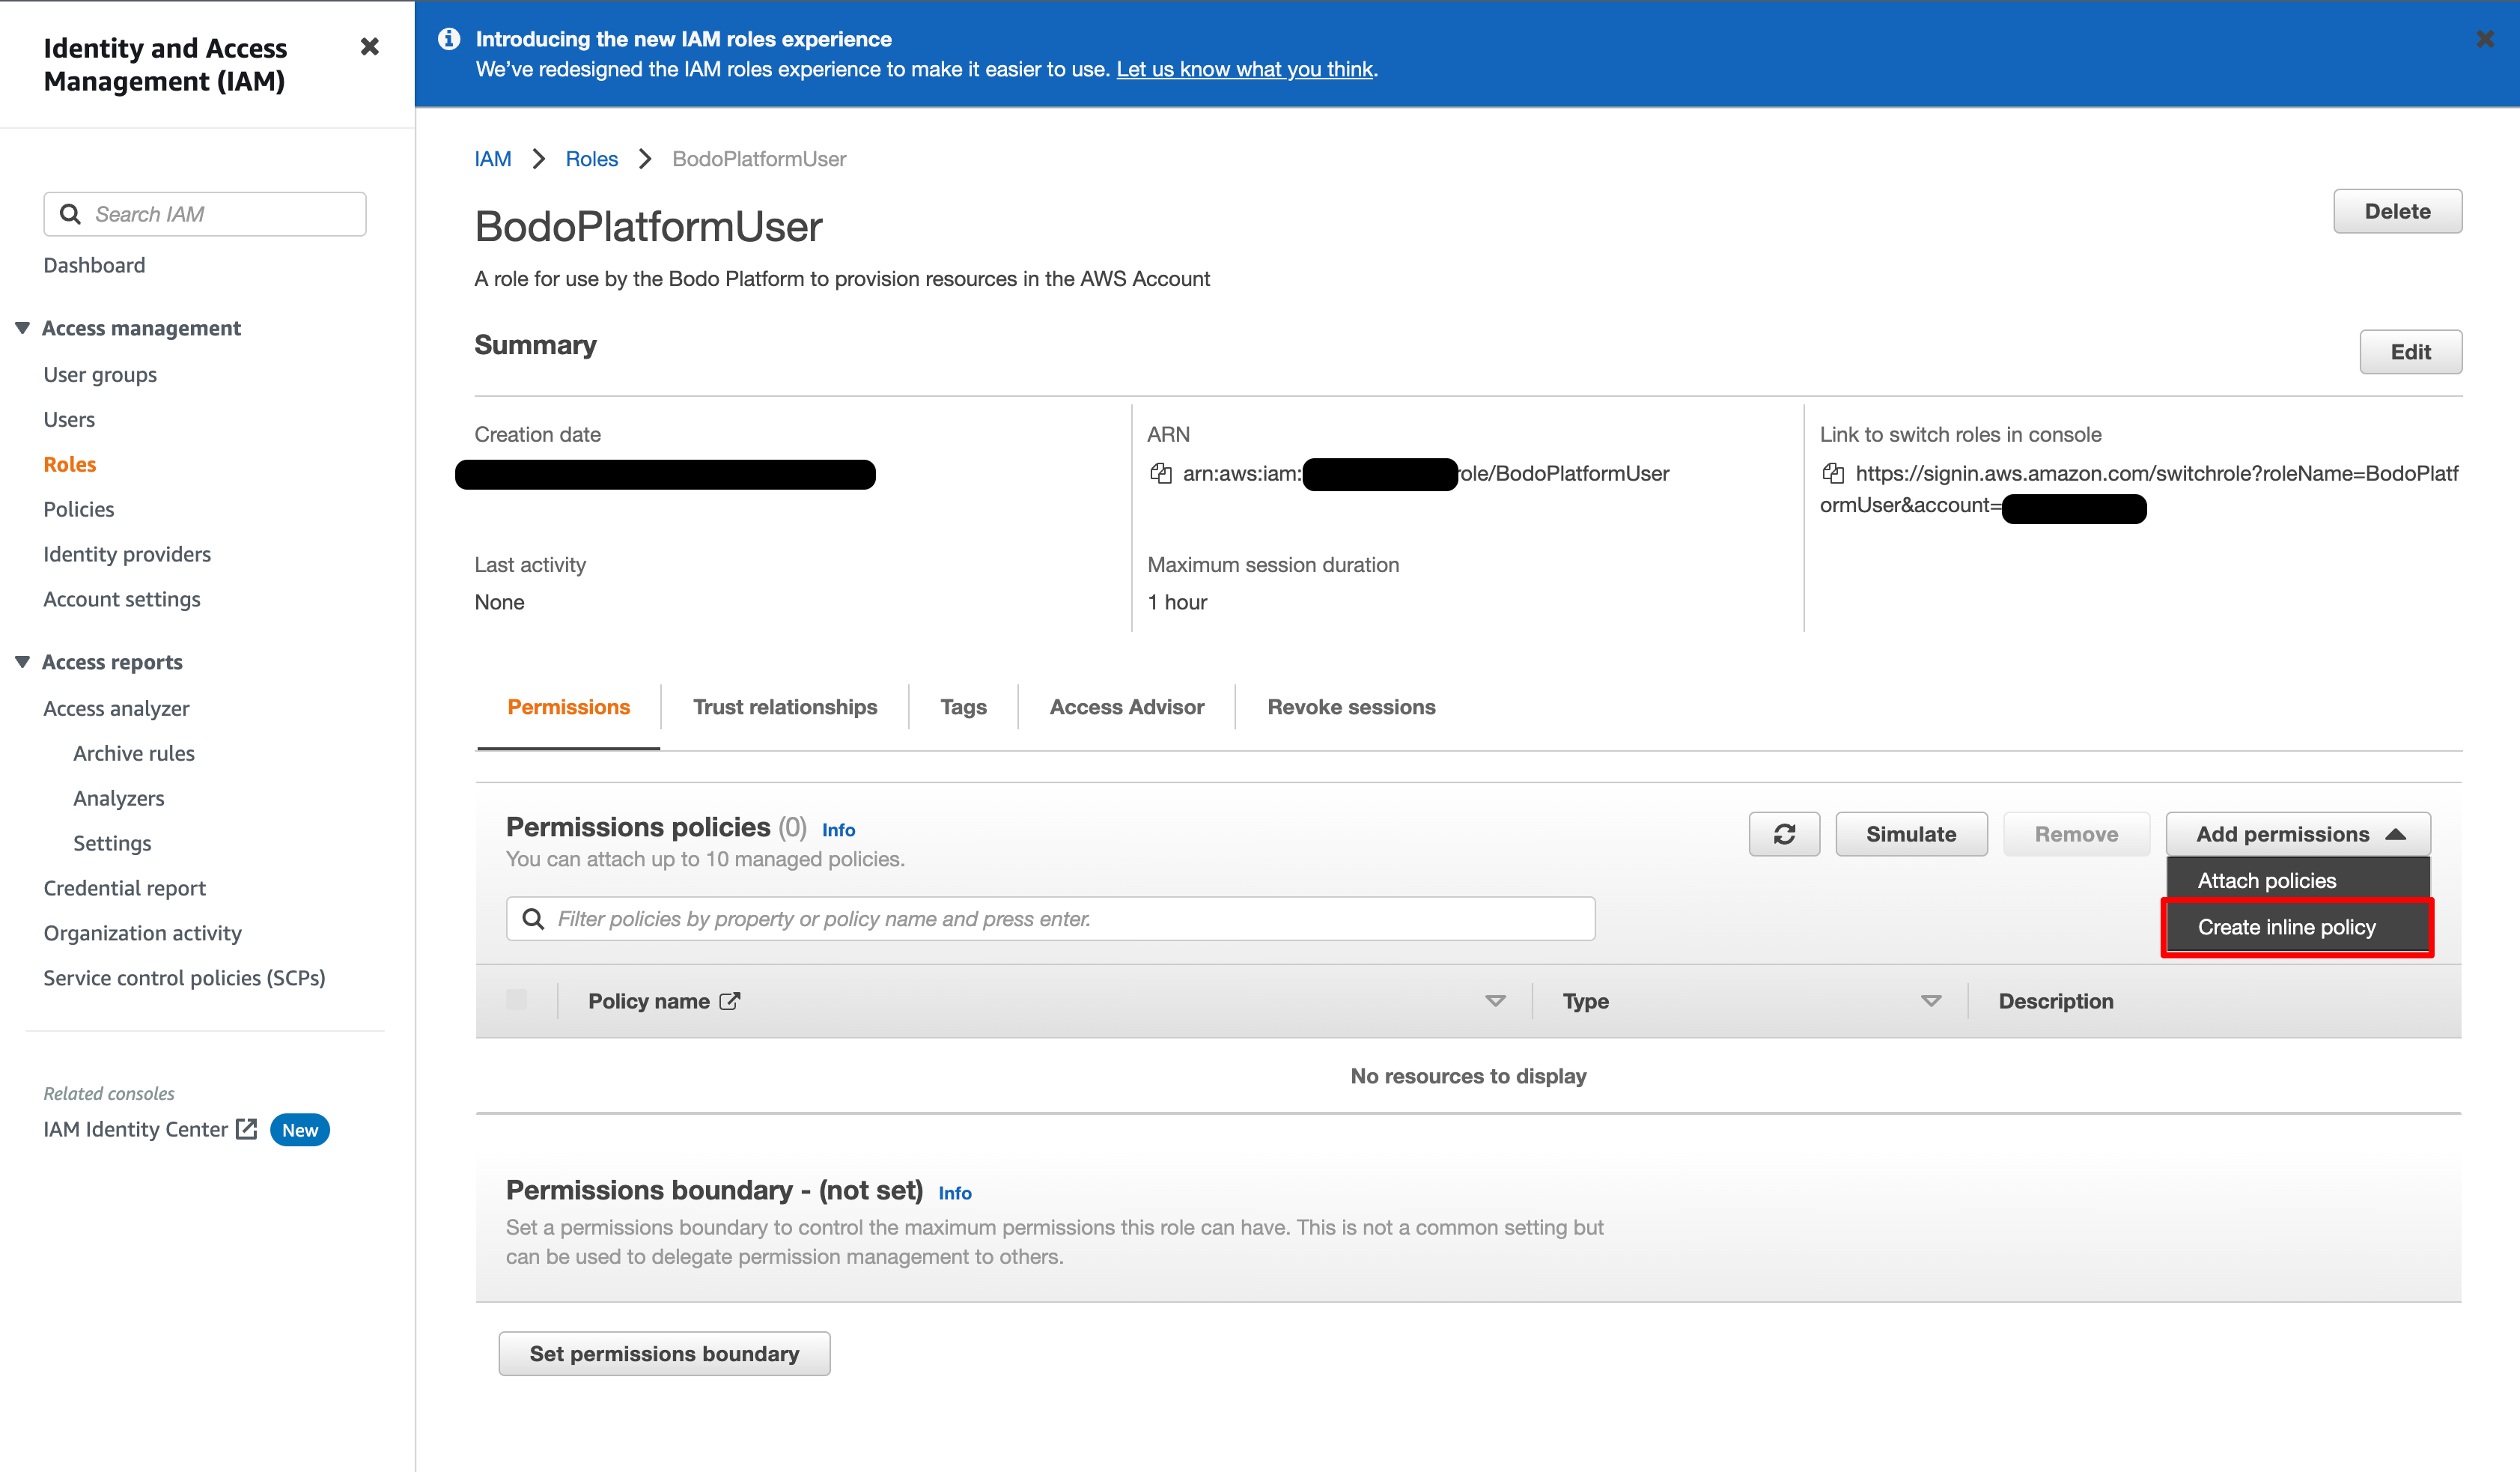
-
Click the
JSONtab.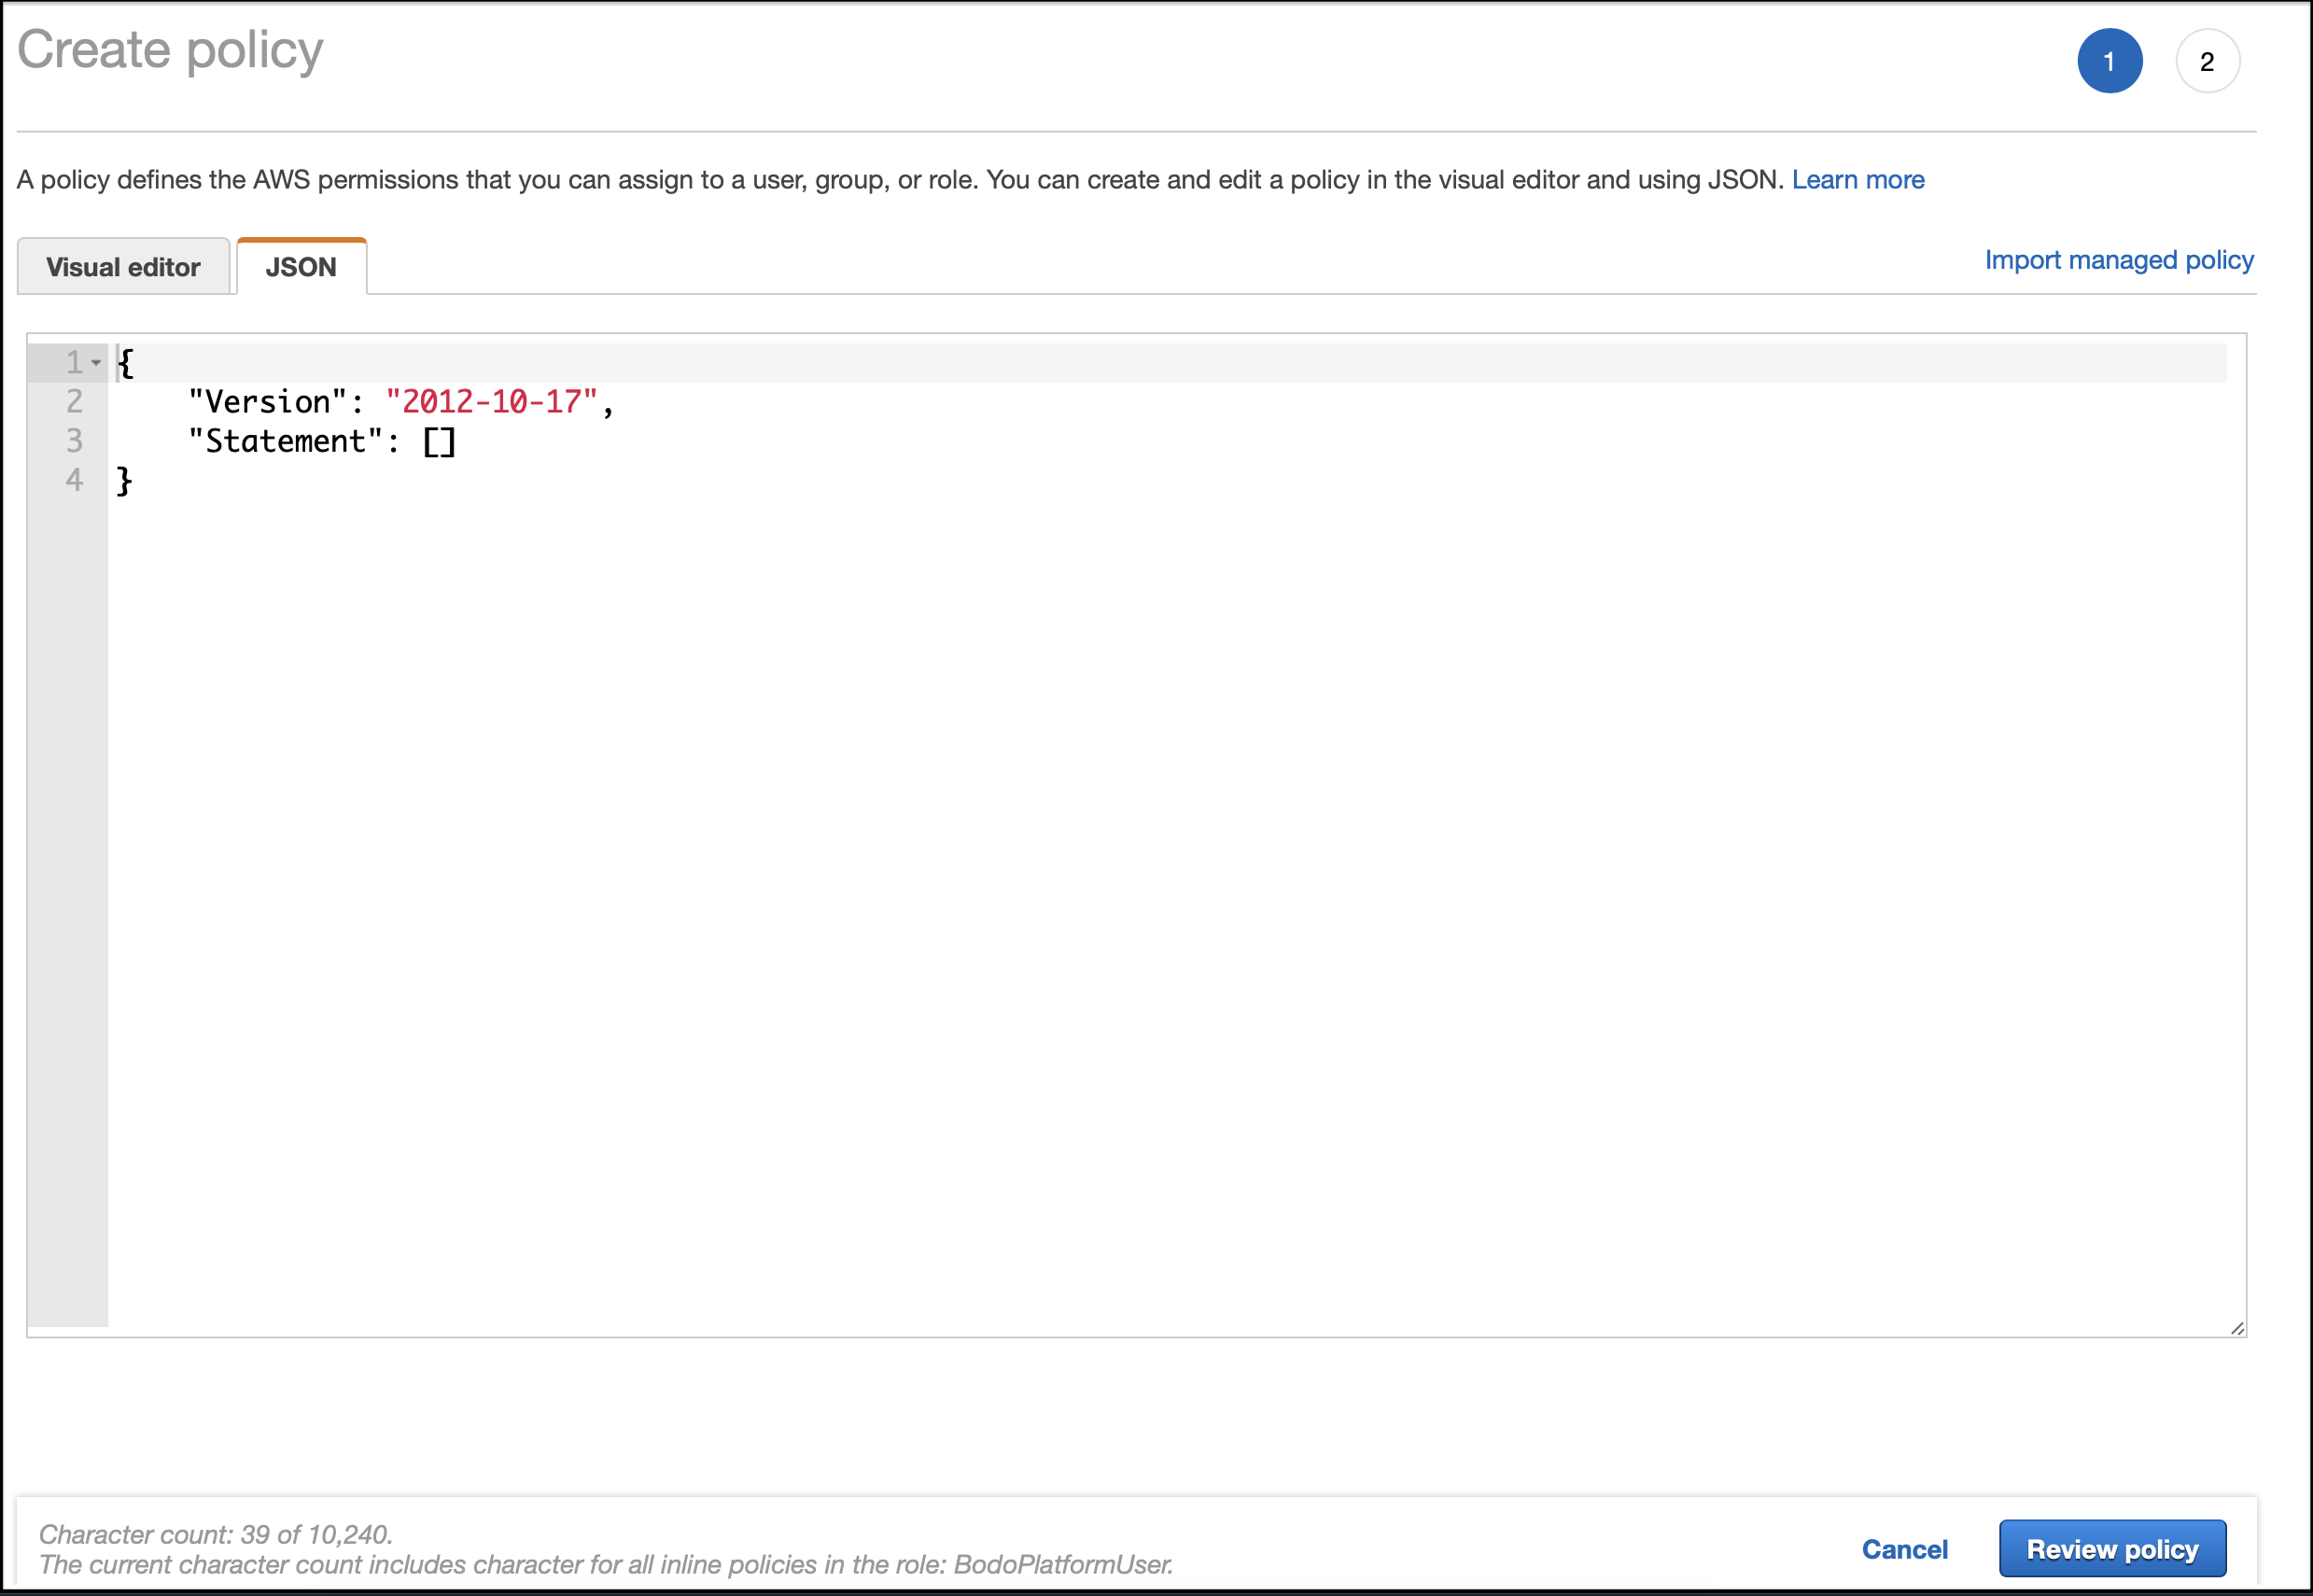
-
Bodo Cloud Platform requires a specific set of AWS permissions which are documented in Bodo-Platform Policy. Paste the contents of the linked JSON file into the policy editor.
-
$$BUCKET_NAME$$and$$DYNAMO_ARN$$placeholders needs to be updated in the Bodo Platform Policy with the S3 Bucket name and Dynamo DB ARN respectively. -
Click on
Review policy. -
In the Name field, add a policy name, e.g.
Bodo-Platform-User-Policy. Click onCreate policy. You will be taken back to the Role Summary. -
From the role summary, copy the
Role ARN. This is the value that you will enter into the Role ARN field on the Setting Page on the Bodo Platform.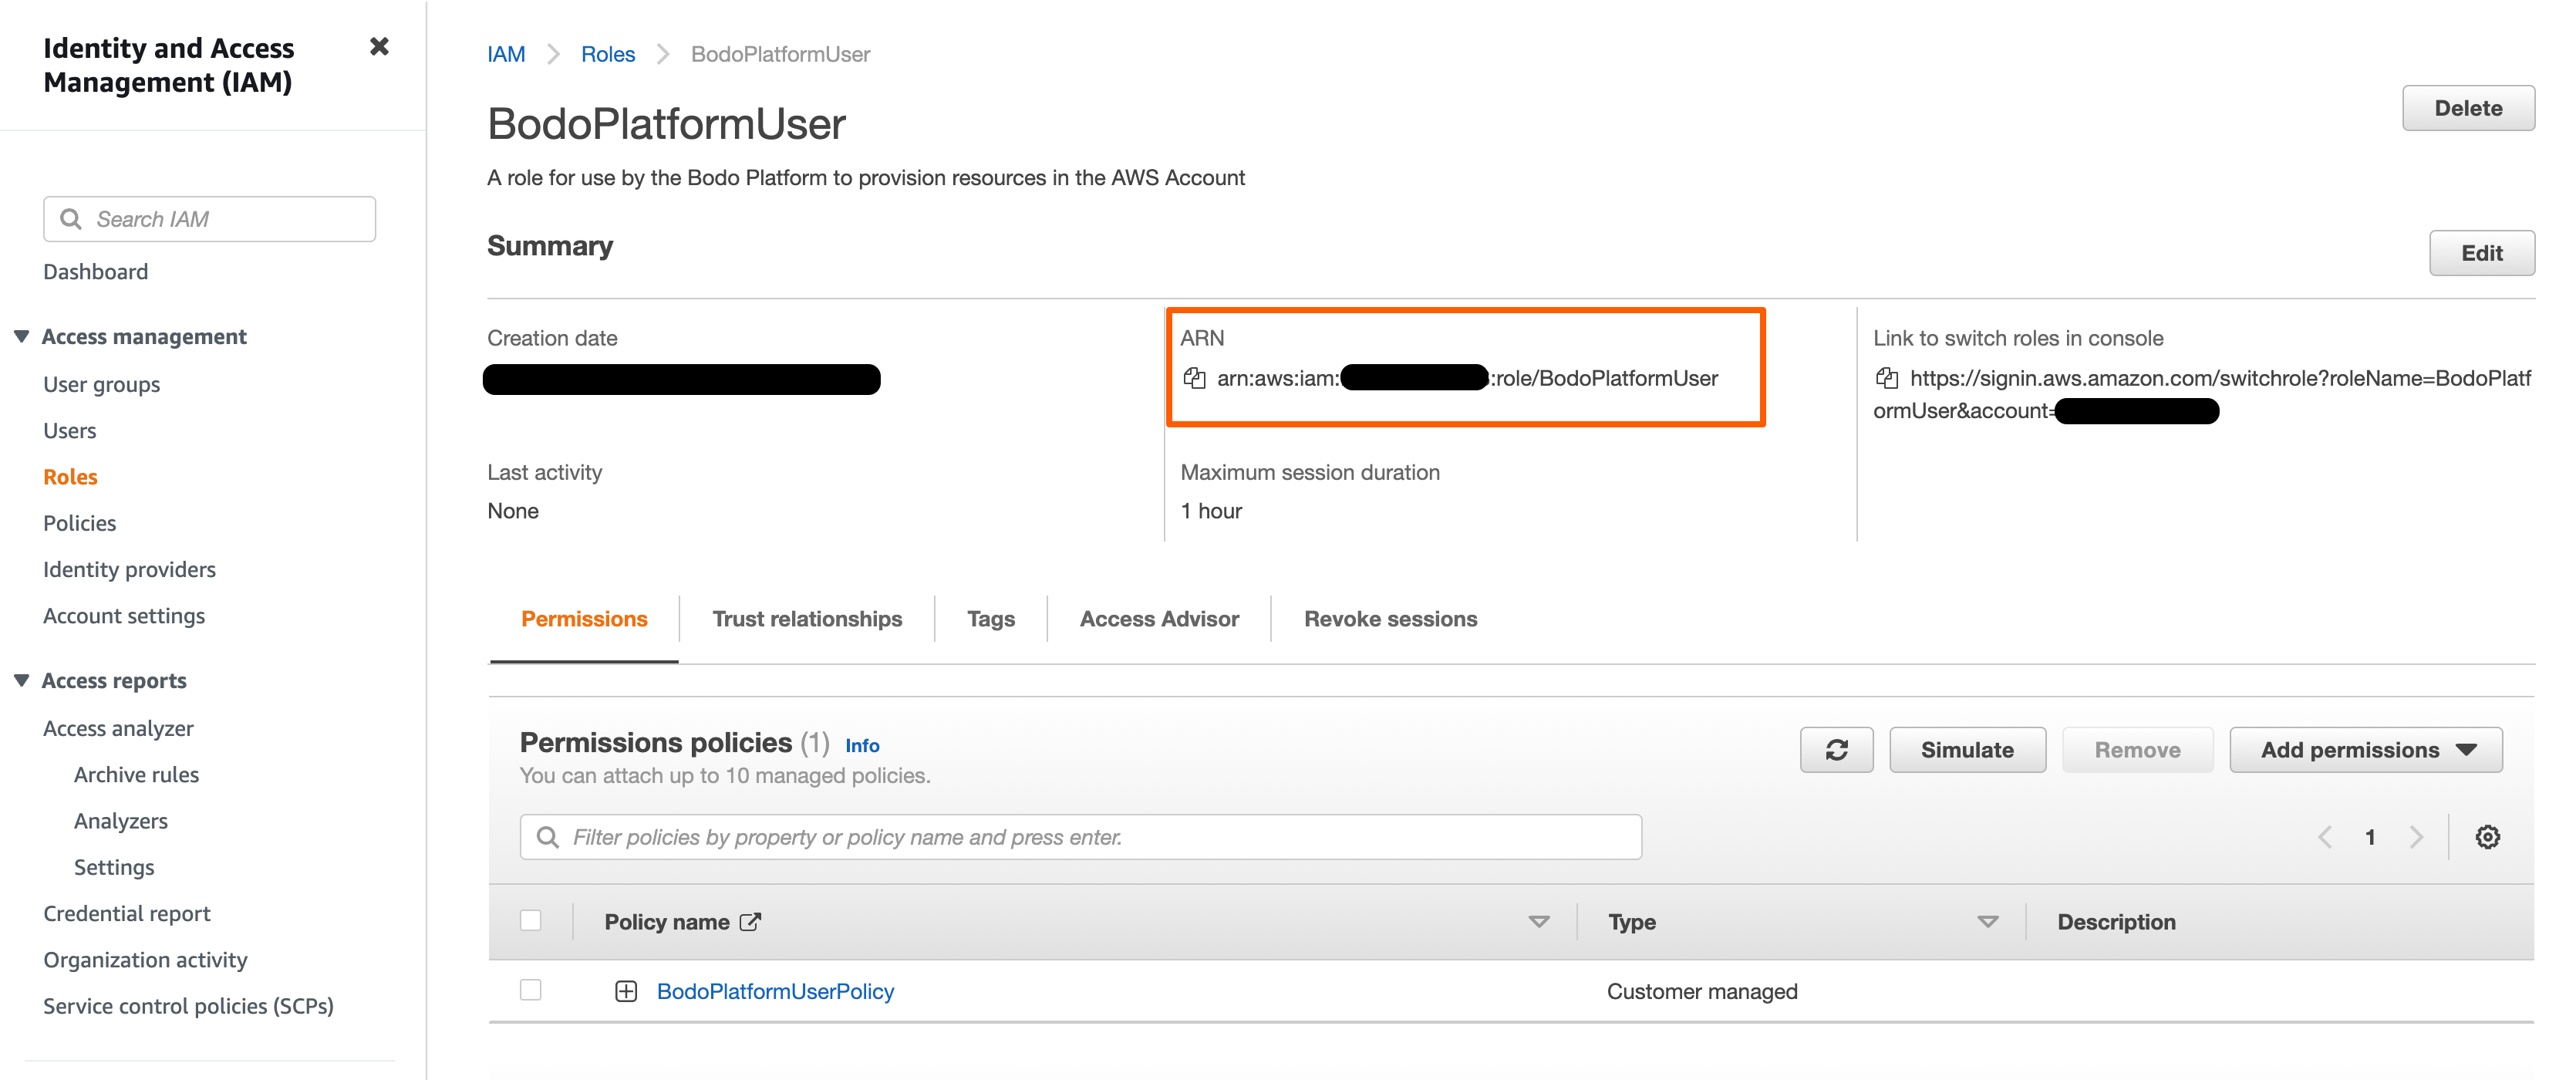
-
Once you have generated an IAM Role using the steps described above, you can fill the remaining fields in the Cloud Configuration form on the Bodo Platform.
- Enter the Name of the configuration.
- Enter the S3 Bucket name.
- Enter the Dynamo DB Table name.
- Enter the Role ARN in the Role ARN field.
- Select a Region from the dropdown list. This is the region of your S3 bucket and Dynamo DB table.
- Click on
CREATE.
Important
We highly recommend that you ensure sufficient limits on your AWS account to launch resources. See here for details on the resources required for Bodo Cloud Platform.
Resources Created in Your AWS Environment
Bodo deploys cluster/notebook resources in your own AWS environment to ensure security of your data. Below is a list of AWS resources that the Bodo Platform creates in your account to enable clusters and notebooks.
| AWS Service | Purpose |
|---|---|
| EC2 Instances | Cluster/notebook workers |
| EFS | Shared file system for clusters |
| VPC, Subnets, NAT Gateway, Elastic IP, ENI, Security Groups, ... | Secure networking for clusters/notebooks |
| S3 and Dynamo DB | Resource states |
| AWS Systems Manager | Managing EC2 instances |
| KMS | Cluster secrets (e.g. SSH keys) |
| IAM Role for Clusters | Allow cluster workers to access resources above |
Note
These resources incur additional AWS infrastructure charges and are not included in the Bodo Platform charges.
Using Bodo Platform
Check the following link on how to use the Bodo Platform once the cloud credentials are added.
Billing
Users subscribed to the Bodo Platform through the AWS Marketplace will be charged for their use of the platform as part of their regular AWS bill. The platform charges are based on the type of instances deployed and the duration of their usage (to the nearest minute). The hourly rate for the supported instance types can be found on our website. For any cluster deployed through the platform, users are charged starting from when the cluster has been successfully deployed, until the time the user requests the cluster to be removed.
Note
Users are not charged in case of failures in cluster creation.
As mentioned previously, the AWS resources set up by the platform in your AWS environment incur additional AWS infrastructure charges, and are not included in the Bodo Platform charges.
Billing Alarms
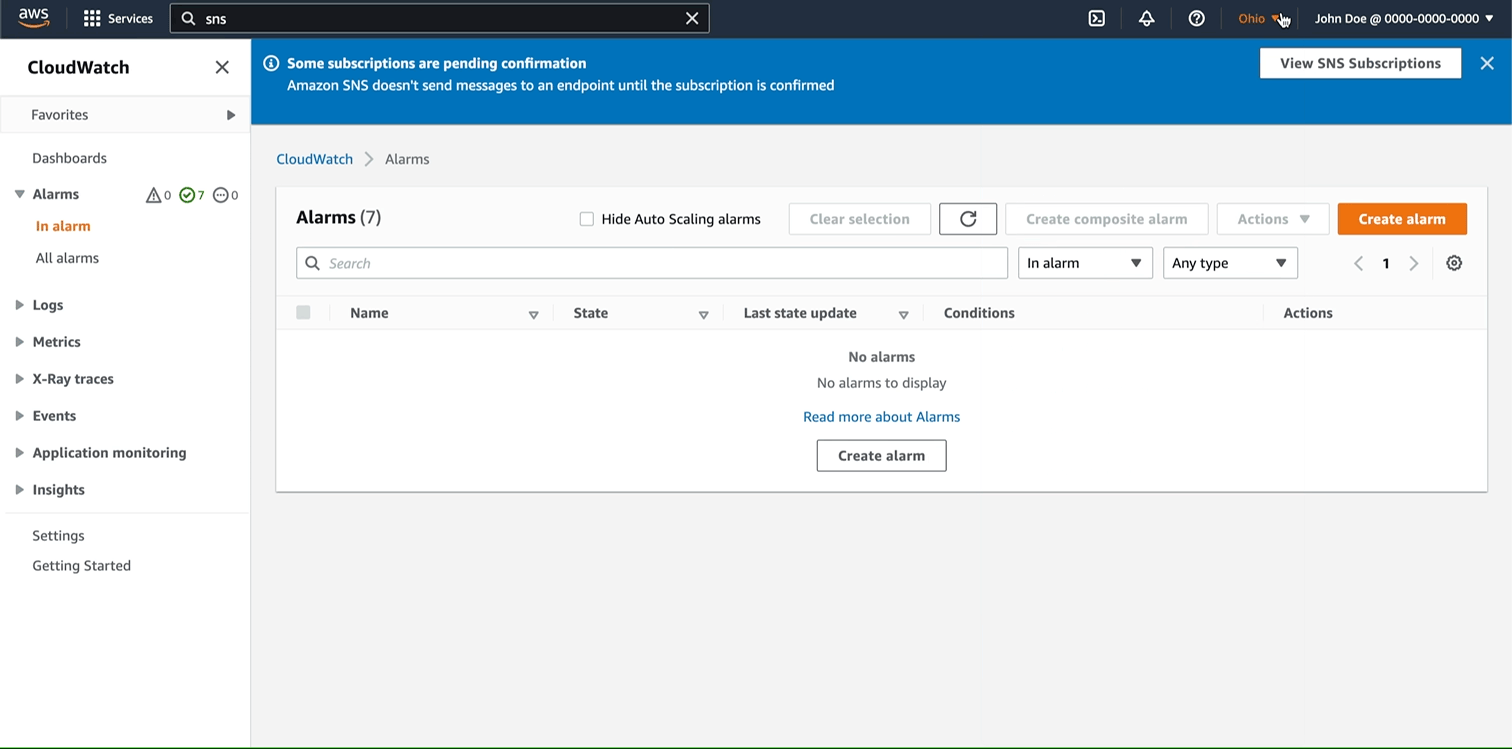
You can set up AWS alarms to monitor usage using cloudwatch alarms on AWS.
Steps to create an alarm on your AWS account for all EC2 usage:
Steps to create an alarm on your AWS account for all EC2 usage:
-
Select the region from which you would like to create the alarm and click
Create Alarm. -
Click on the
Select metricwhich would bring you to a search bar that allows you to search and select the metric of your choice. Make sure to click on the check box of the metric of your choice. In this example, we choose vCPU for monitoring EC2 usage. -
Set a reasonable number for the threshold for an alarm to go off based on your usage expectations. If you do not have this you can use the history of the metric to get an estimate. The history can be viewed by clicking on the expand button on the graph. You can toggle the time range by clicking on the available options (e.g.
1wfor 1 week) on the top panel. You can use the graph to set the desired threshold for your alarm. The default period for the alarm threshold is 5 minutes but can be altered based on your requirement. In this example above we set the alarm to become active, if the vCPU count is greater than 1000 for 5 minutes as the highest value found from the last week was ~850. ClickNextat the bottom of the page after you have set the threshold and period. -
You will now be asked to select the Simple Notification Service (SNS) Topic for this alarm.
a. If you already have an existing SNS Topic you can choose it from the dropdown list by clicking on the
Select an Existing SNS Topicradio button.b. If you do not have an SNS Topic, then create a new SNS Topic by clicking on the
Create New Topicradio button. Fill in the form with an appropriateTopic Nameand provide the emails (Those who should be alerted by the alarm) in theEmail endpoints that will receive the notificationtab.Once you have provided these details you can click on
Nextat the bottom of the page. -
You will now be required to fill out the details of the alarm itself, fill the fields with the appropriate details and click
Nextat the bottom of the page. -
Finally, preview your alarm before you click on
Create Alarmat the bottom of the page to create the Alarm.